roydan
Senior Member
Founding Member
Sapphire Member
Patron
Hot Rod
- Joined
- Mar 30, 2025
- Messages
- 2,384
- Reaction Score
- 6,248
I had been planning to write this for a few weeks, and it was actually the reason I asked for this section.
In this guide, I'll show you how you can connect your website forms to Google Sheets (don't worry, Rem, you can also use Excel 365) through Make (using a webhook).
At this point, Make might still offer a free 3 months of their Team package (through here). The last comment from Apr 30 stated that it's still working.
That being said, this guide will work on Make's free tier as well.
I tried to write this guide in a way that it will be understood by people who have never used Make before. If there's anything I haven't covered or you still have questions, just post them below.
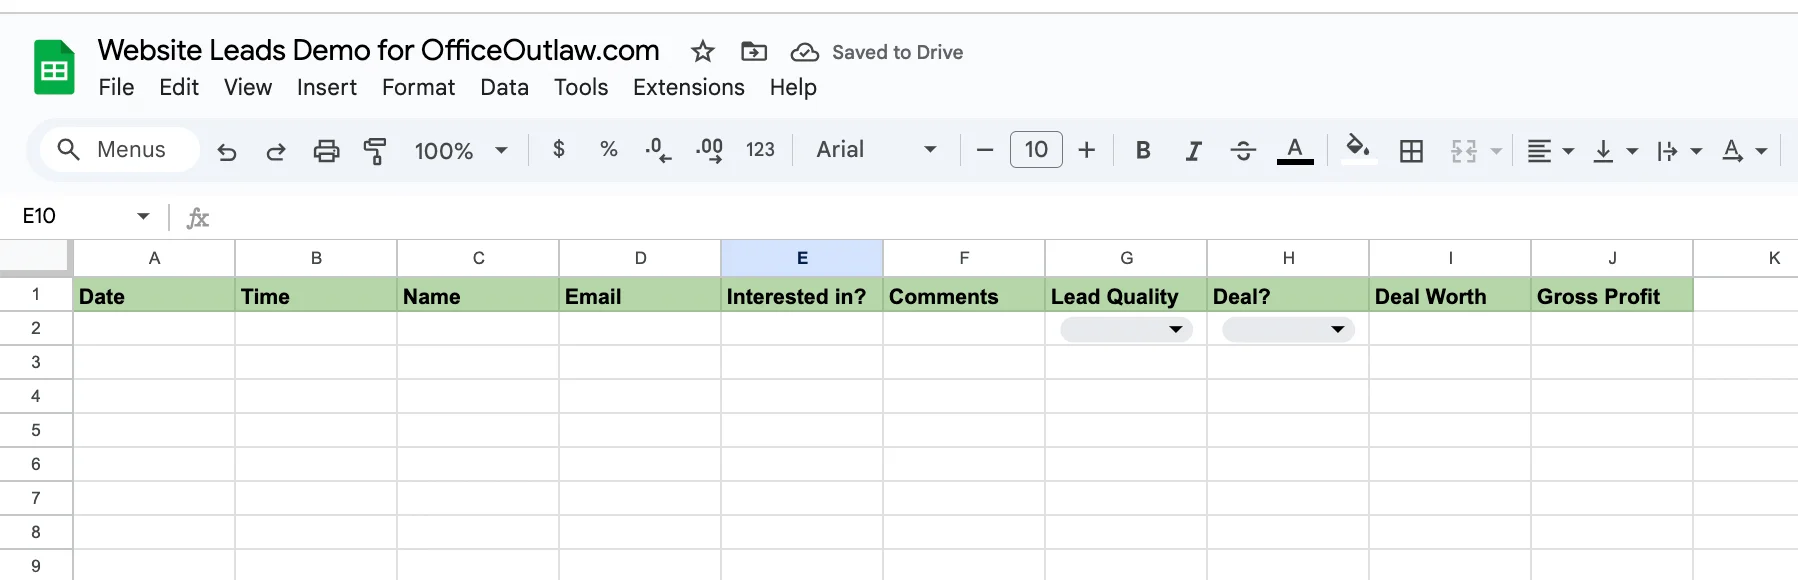
There are many different ways to manage the sheet itself, and in my case, I use it mainly to help clients keep track of their leads if they don't have a CRM system in place. Here's an example of how it can look and work when several sources are connected to the same sheet. The data is fake, and it's regenerated on every update, so don't get too excited.
Let's get to it.
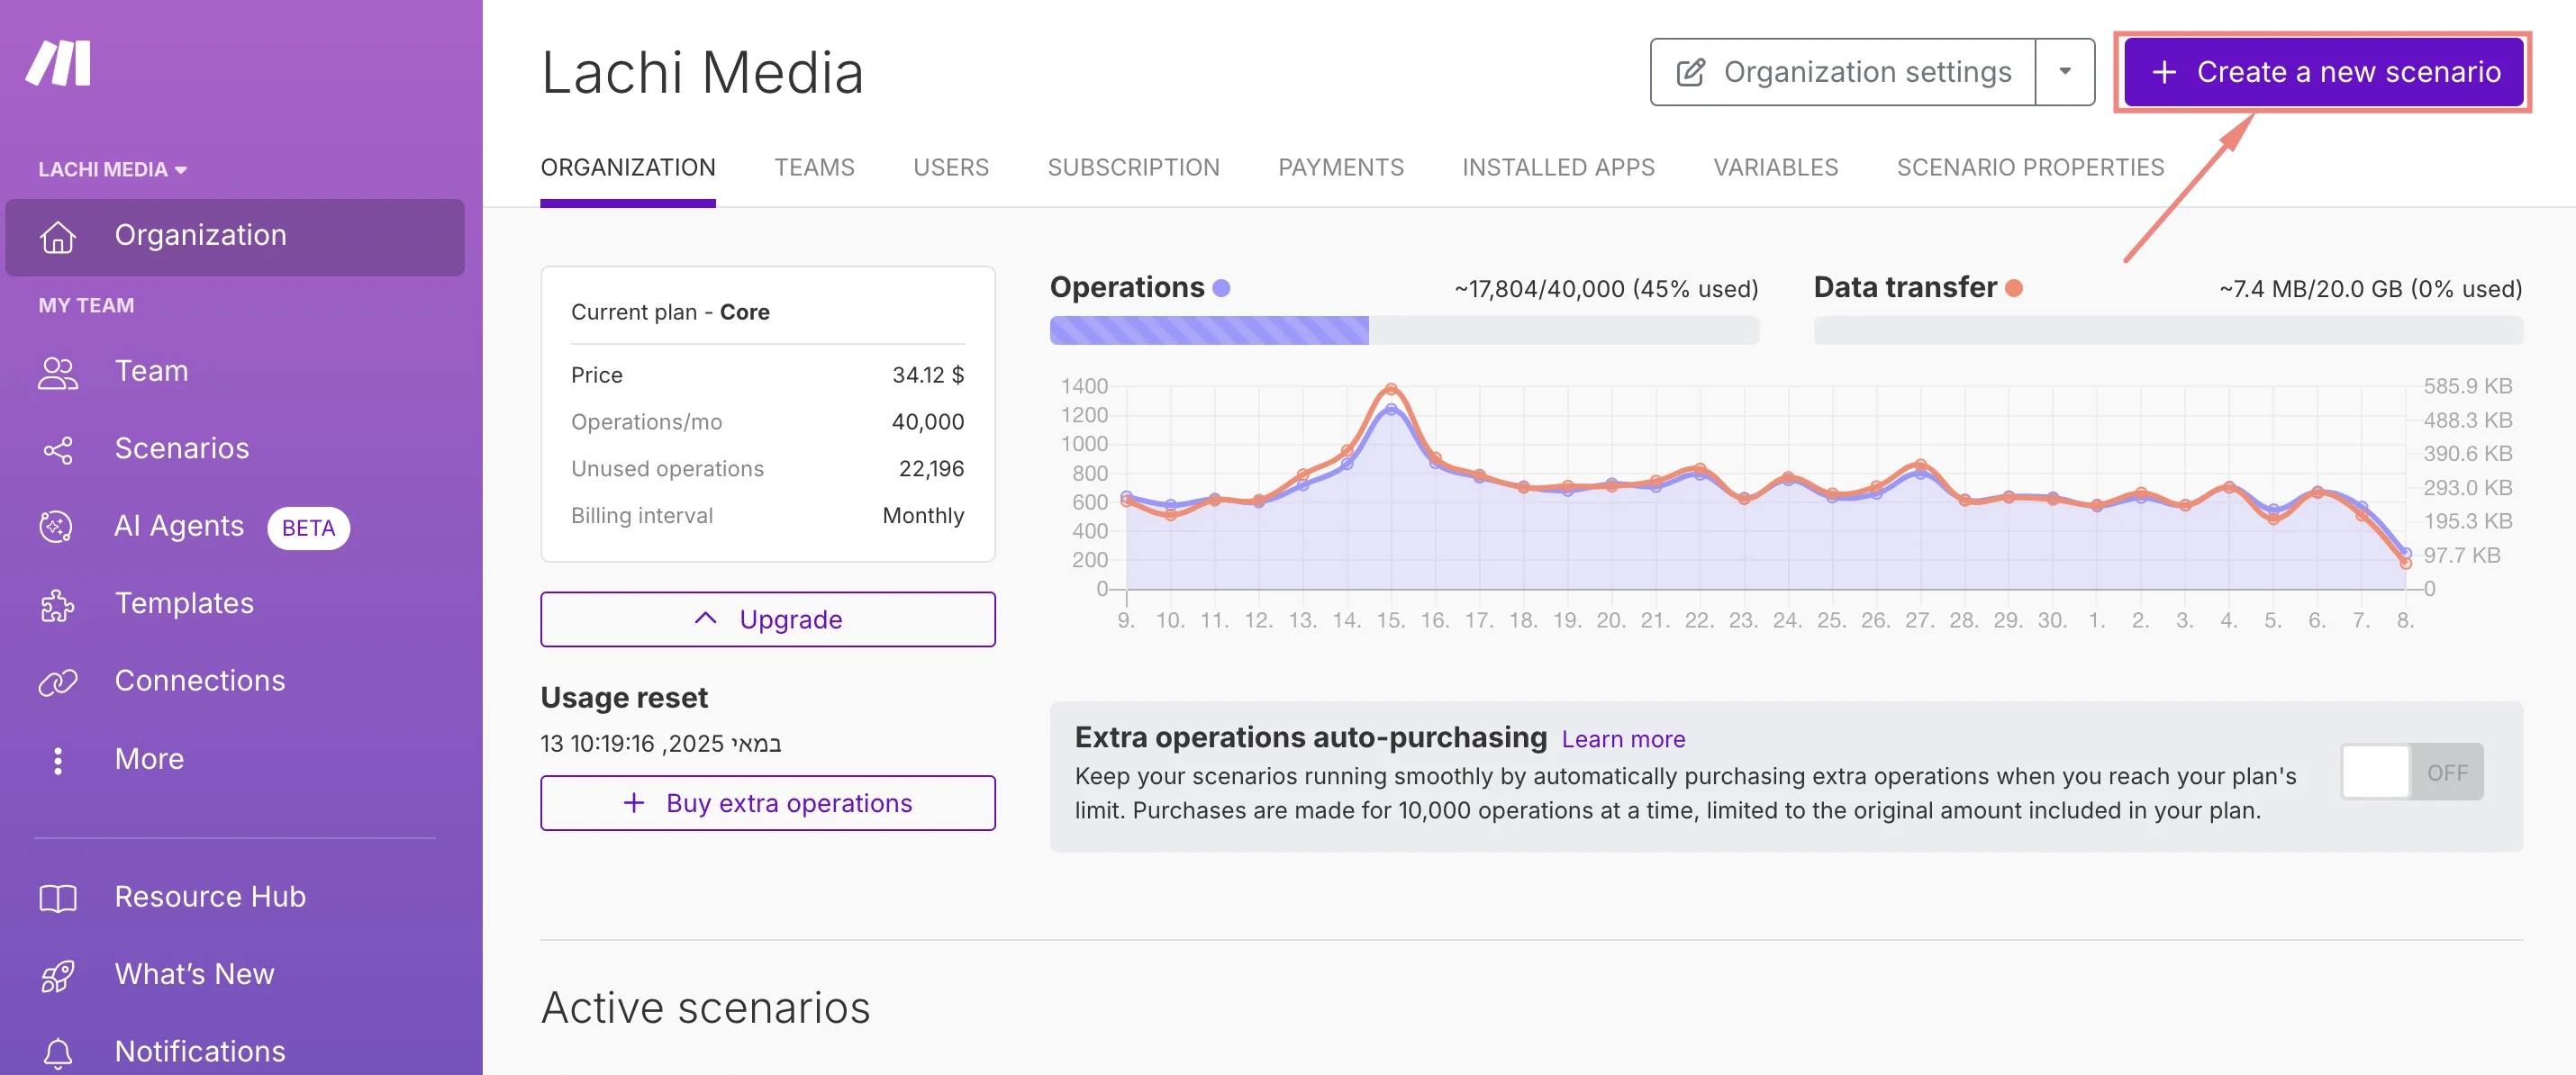
We'll start by creating a new scenario. A scenario is basically (and in a very simplistic way):
A process that takes one thing (in our case, a form submission from your site), edits it (so that the data is presentable and can be accepted by another service, like Google Sheets), and then sends it elsewhere (a Google Sheets document).

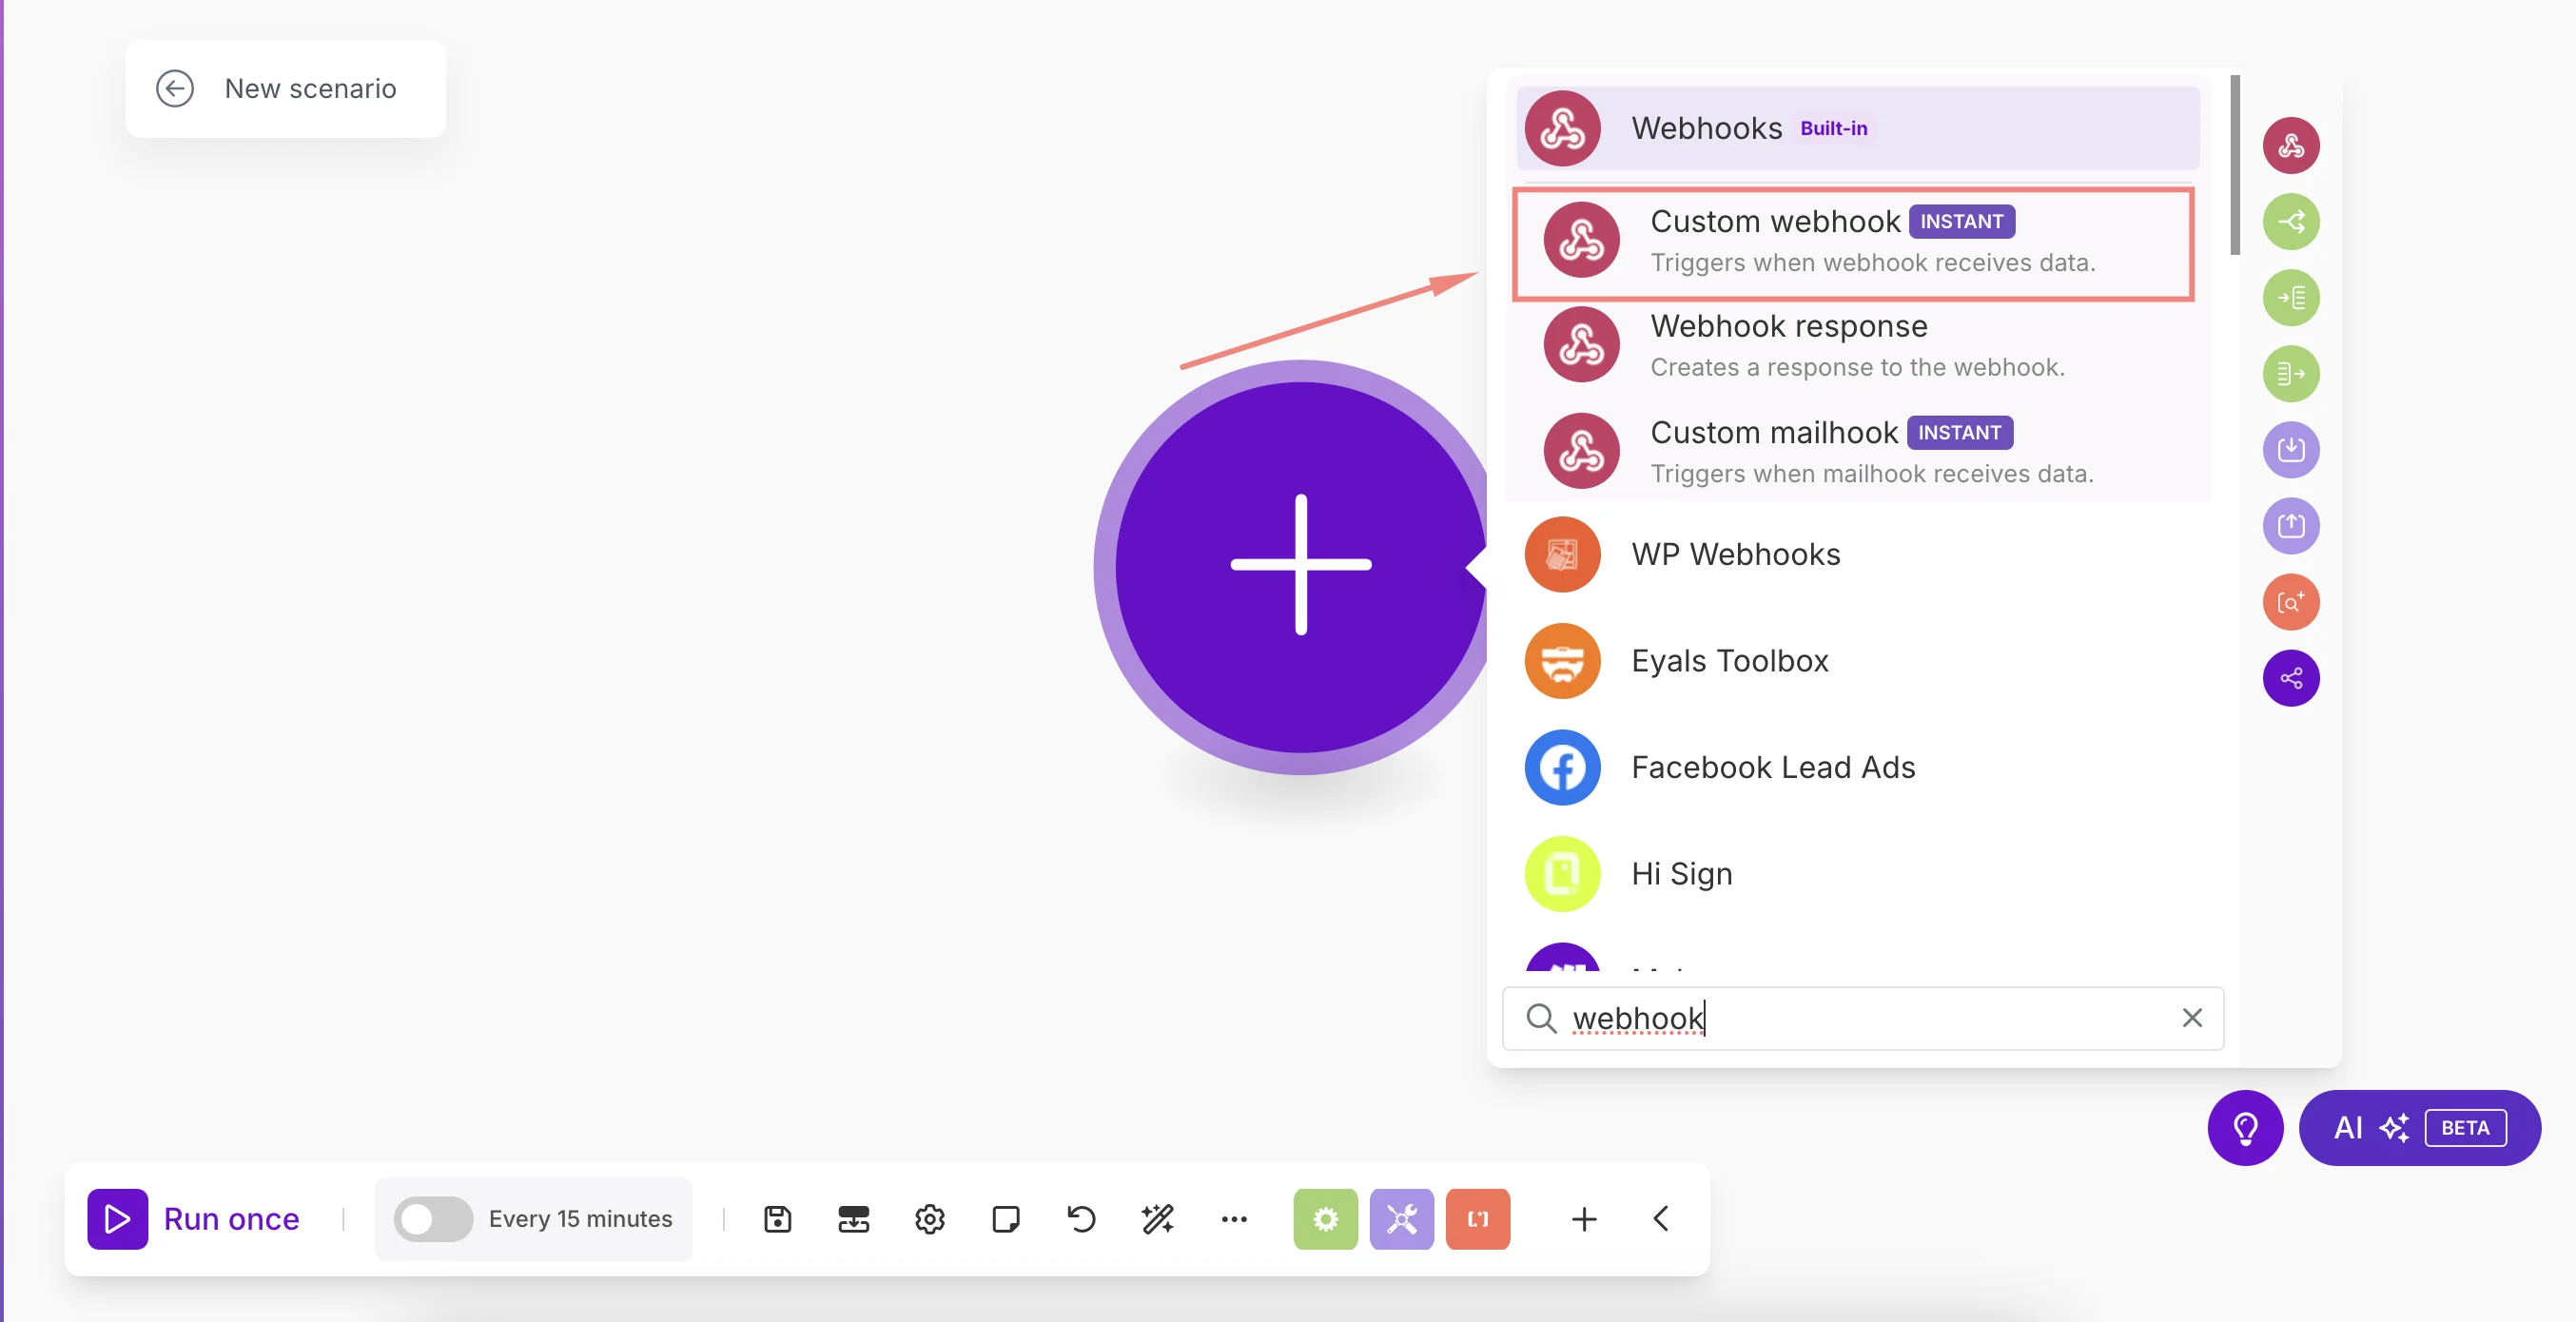
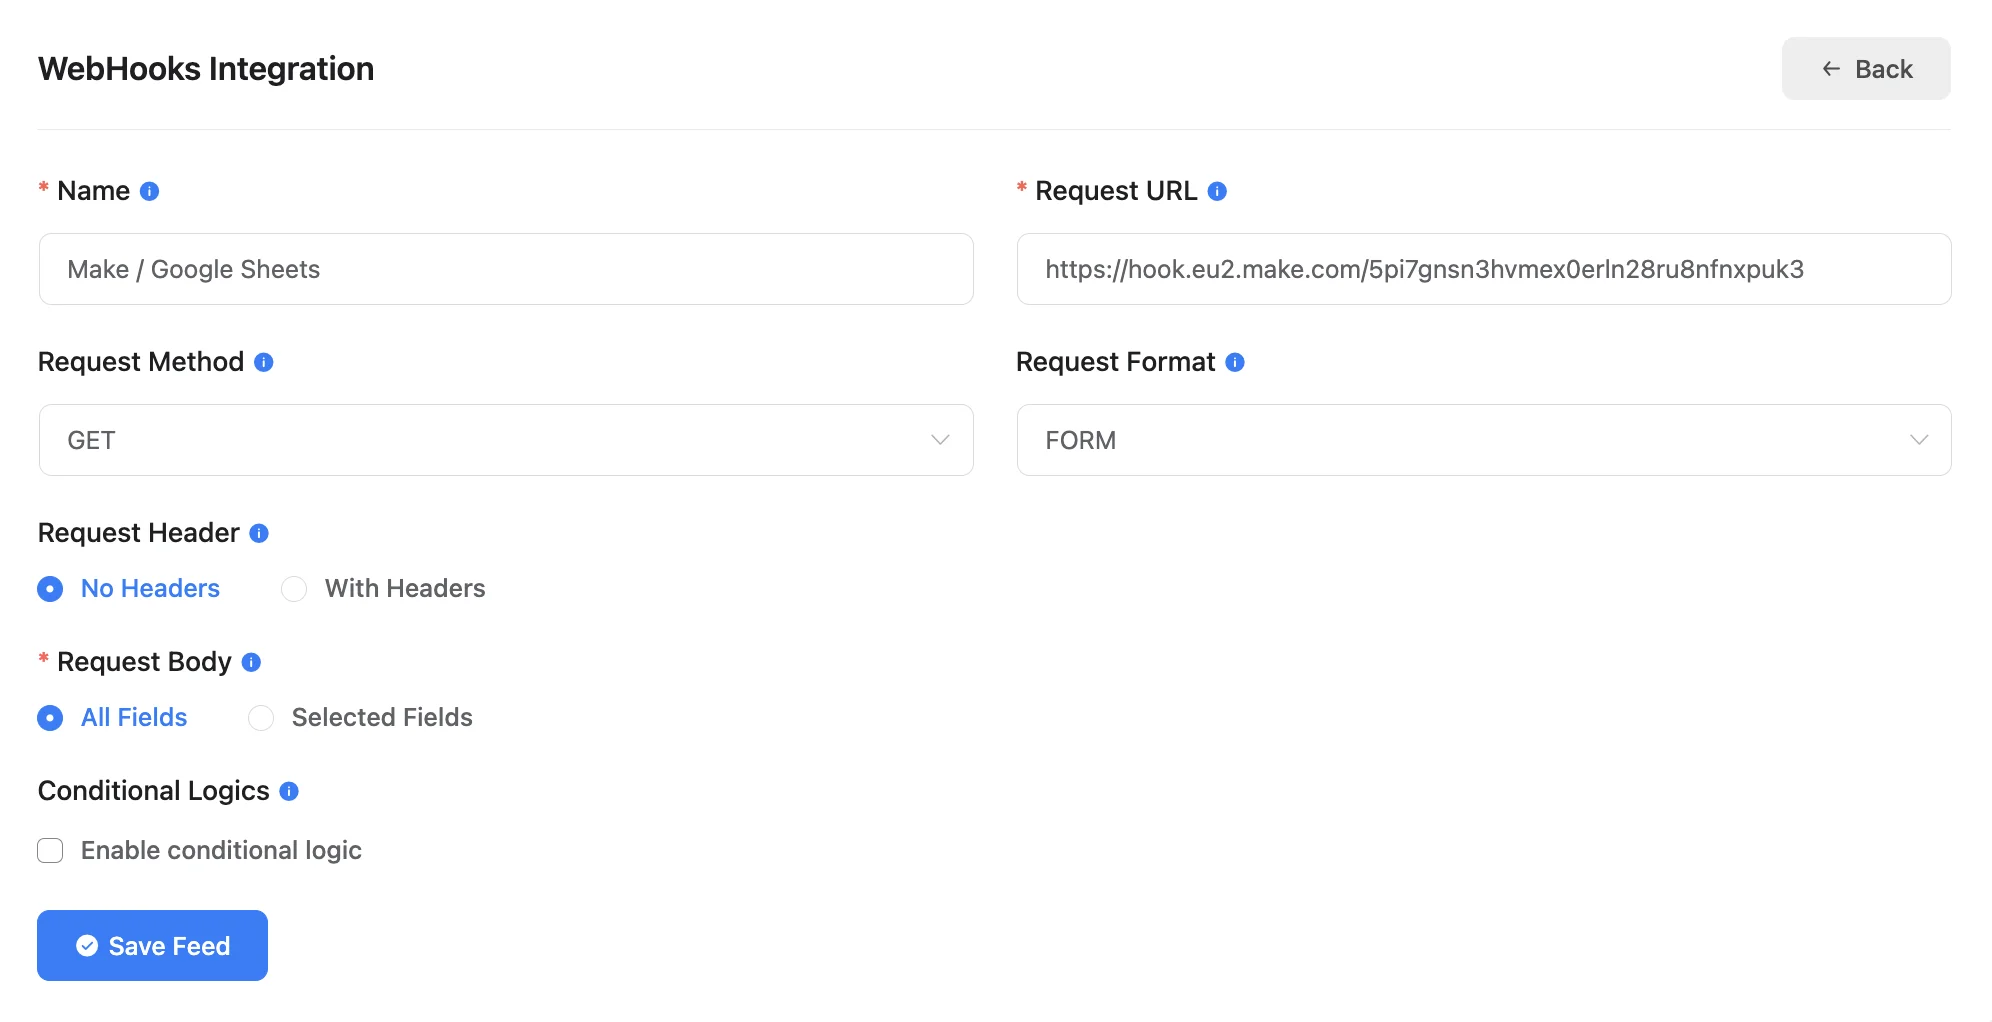
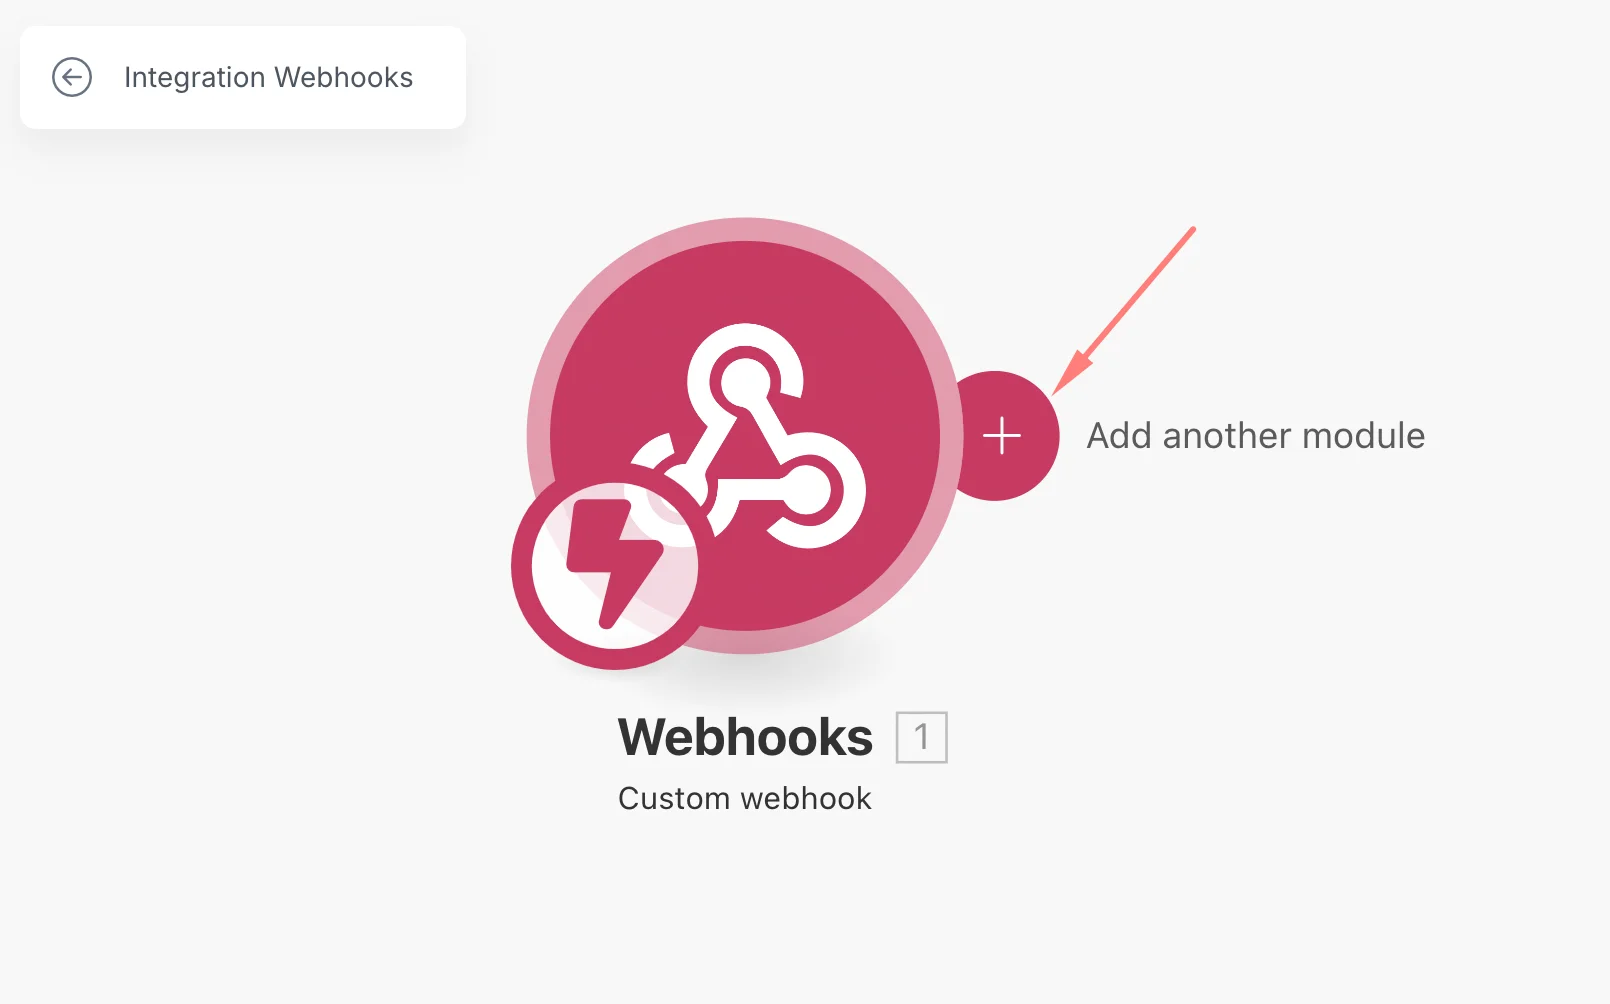
In the new scenario, we'll click on the big + sign in the middle and create a new custom webhook.
A webhook is very similar to the way S2S tracking works. It's a URL that contains parameters that include data we want to use (in our case, form fields and a few meta fields such as time of submission)
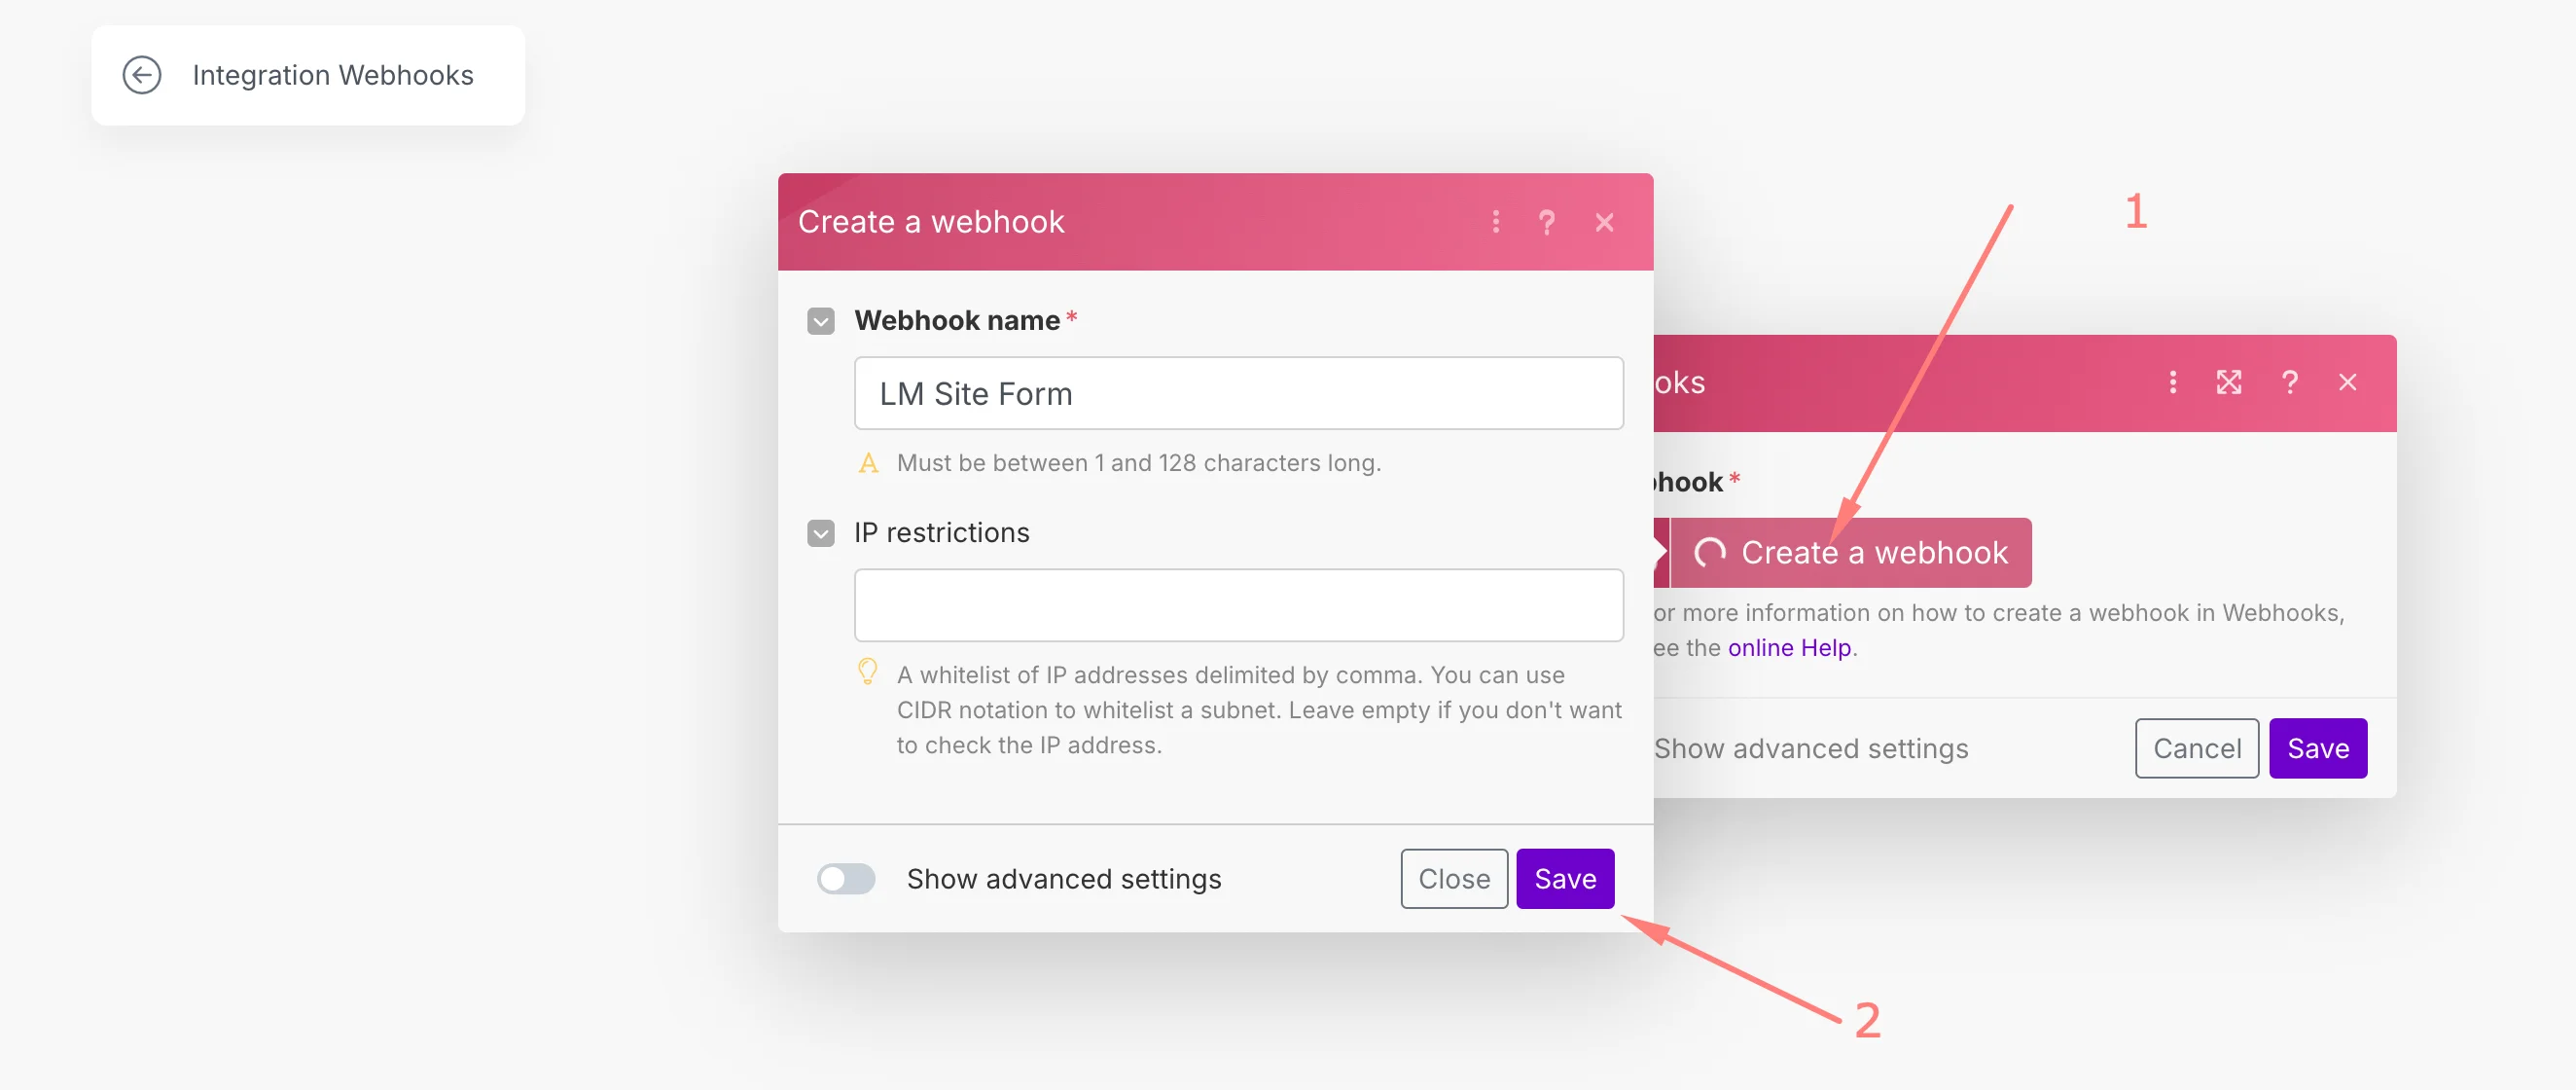
A pro tip: Name your webhooks appropriately so you can find them later and they stay organized.
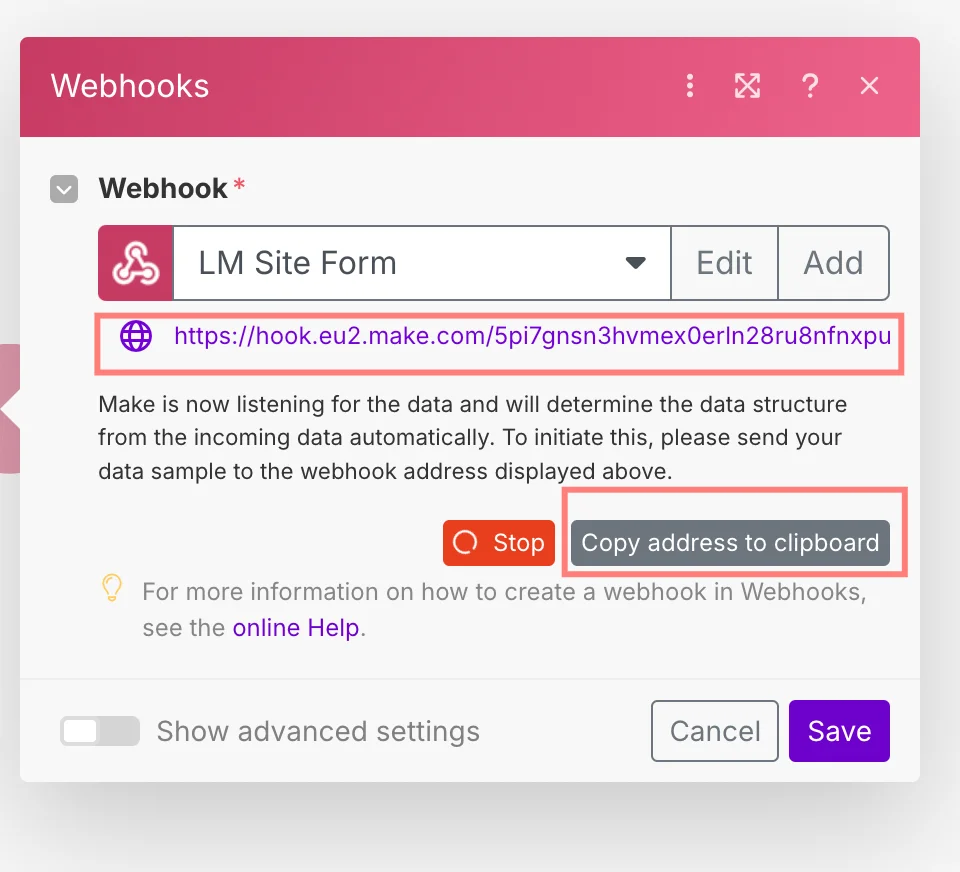
Now, copy your webhook URL, so you can paste it on your site form.
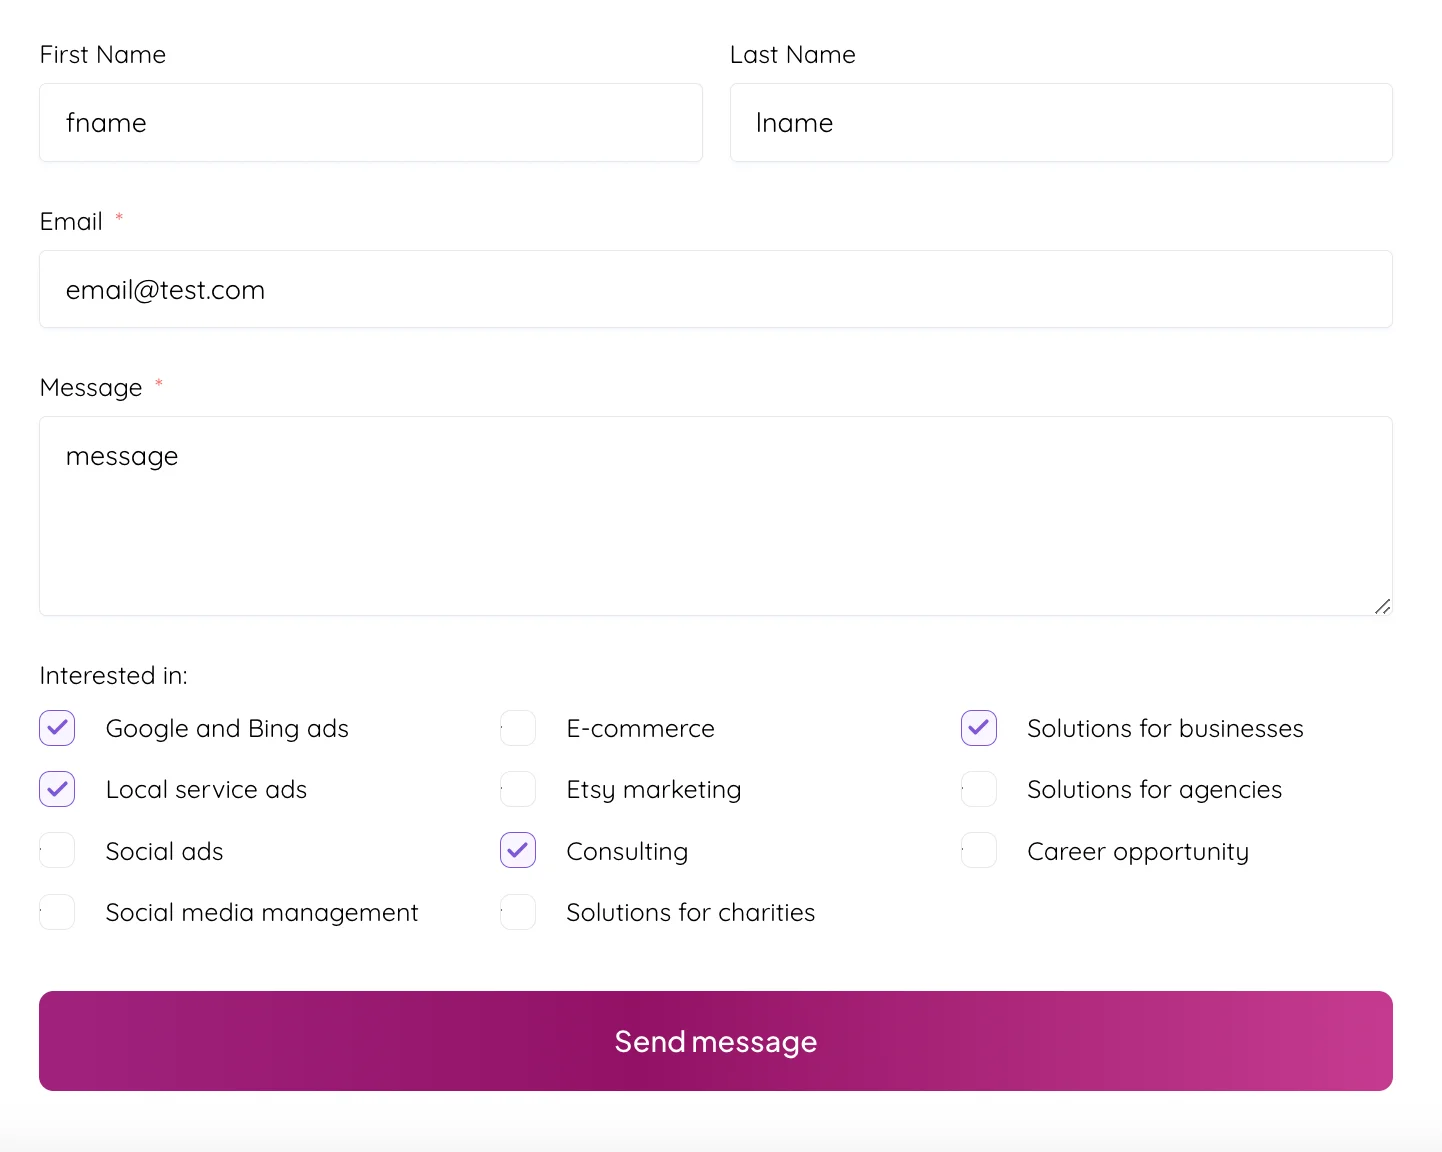
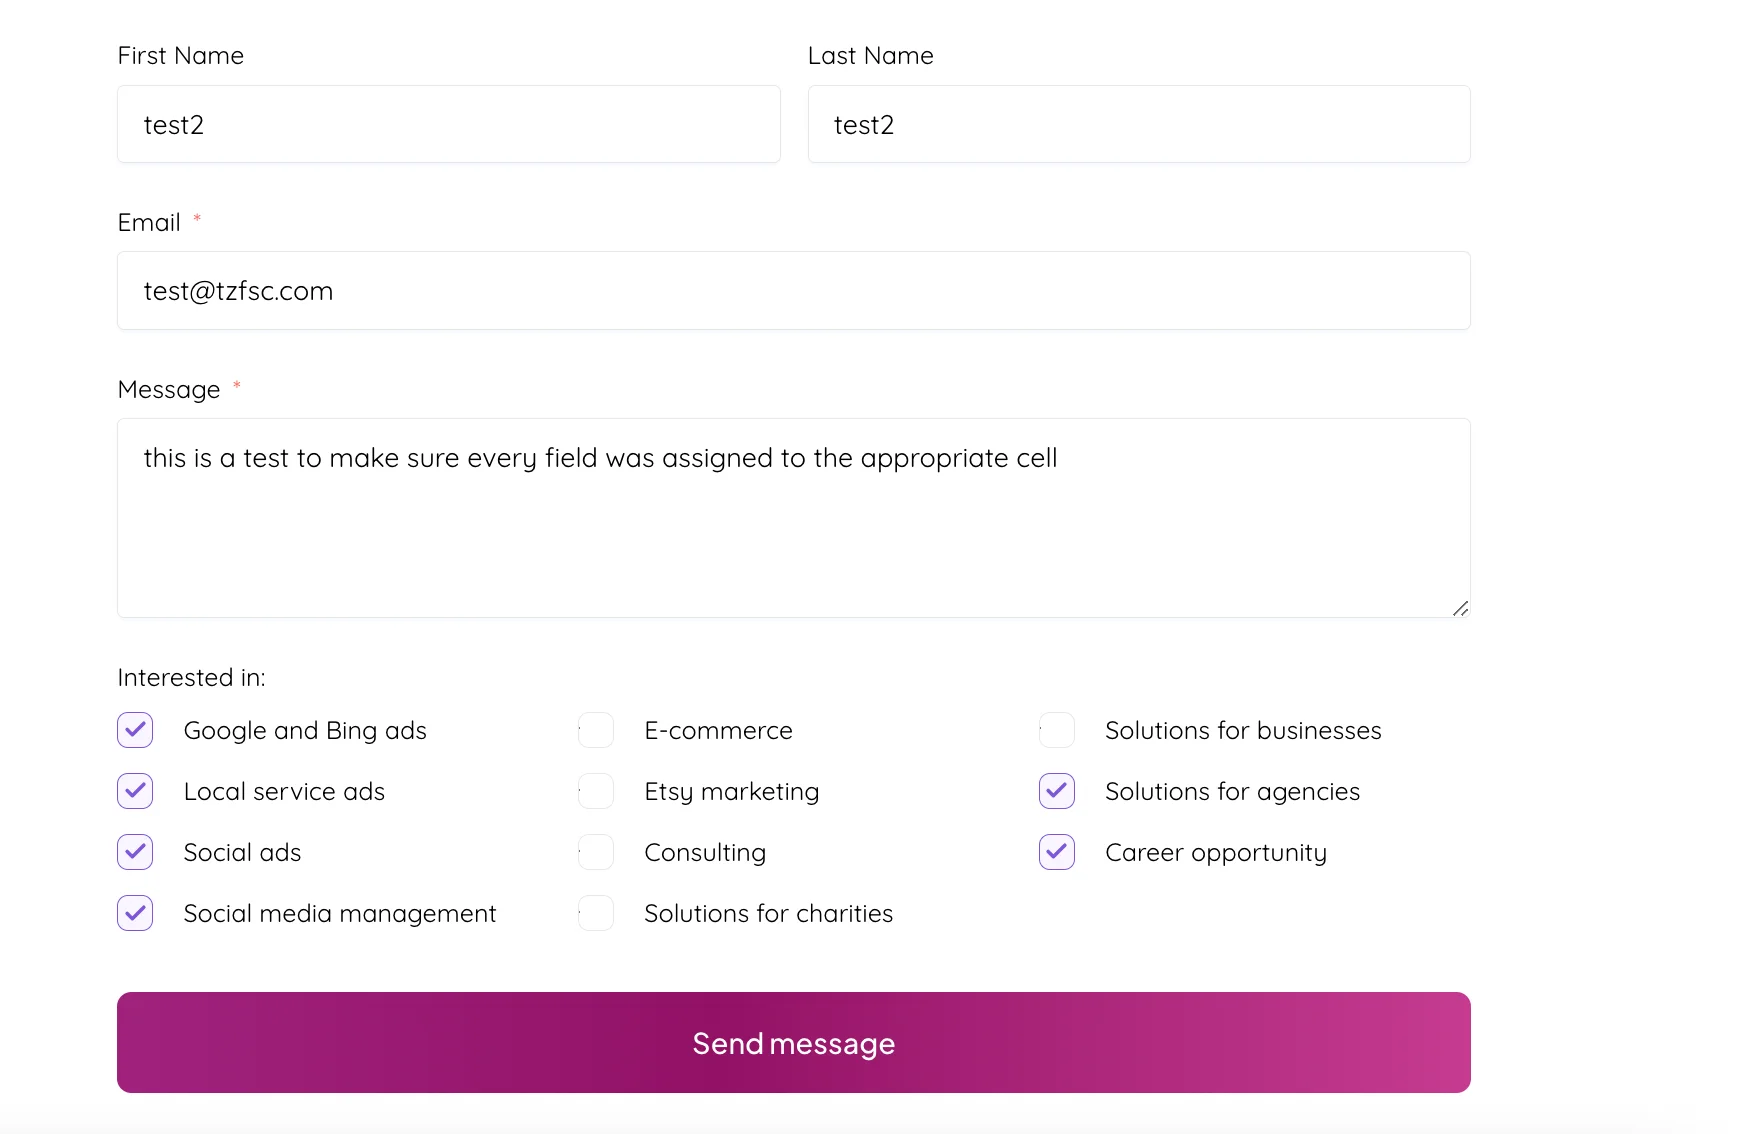
This is how the Fluent Forms integration looks, but each form solution does it differently. CF7 requires an additional free add-on, and Elementor has it built-in in the forms under "Actions after submit." Most of them are relatively similar.
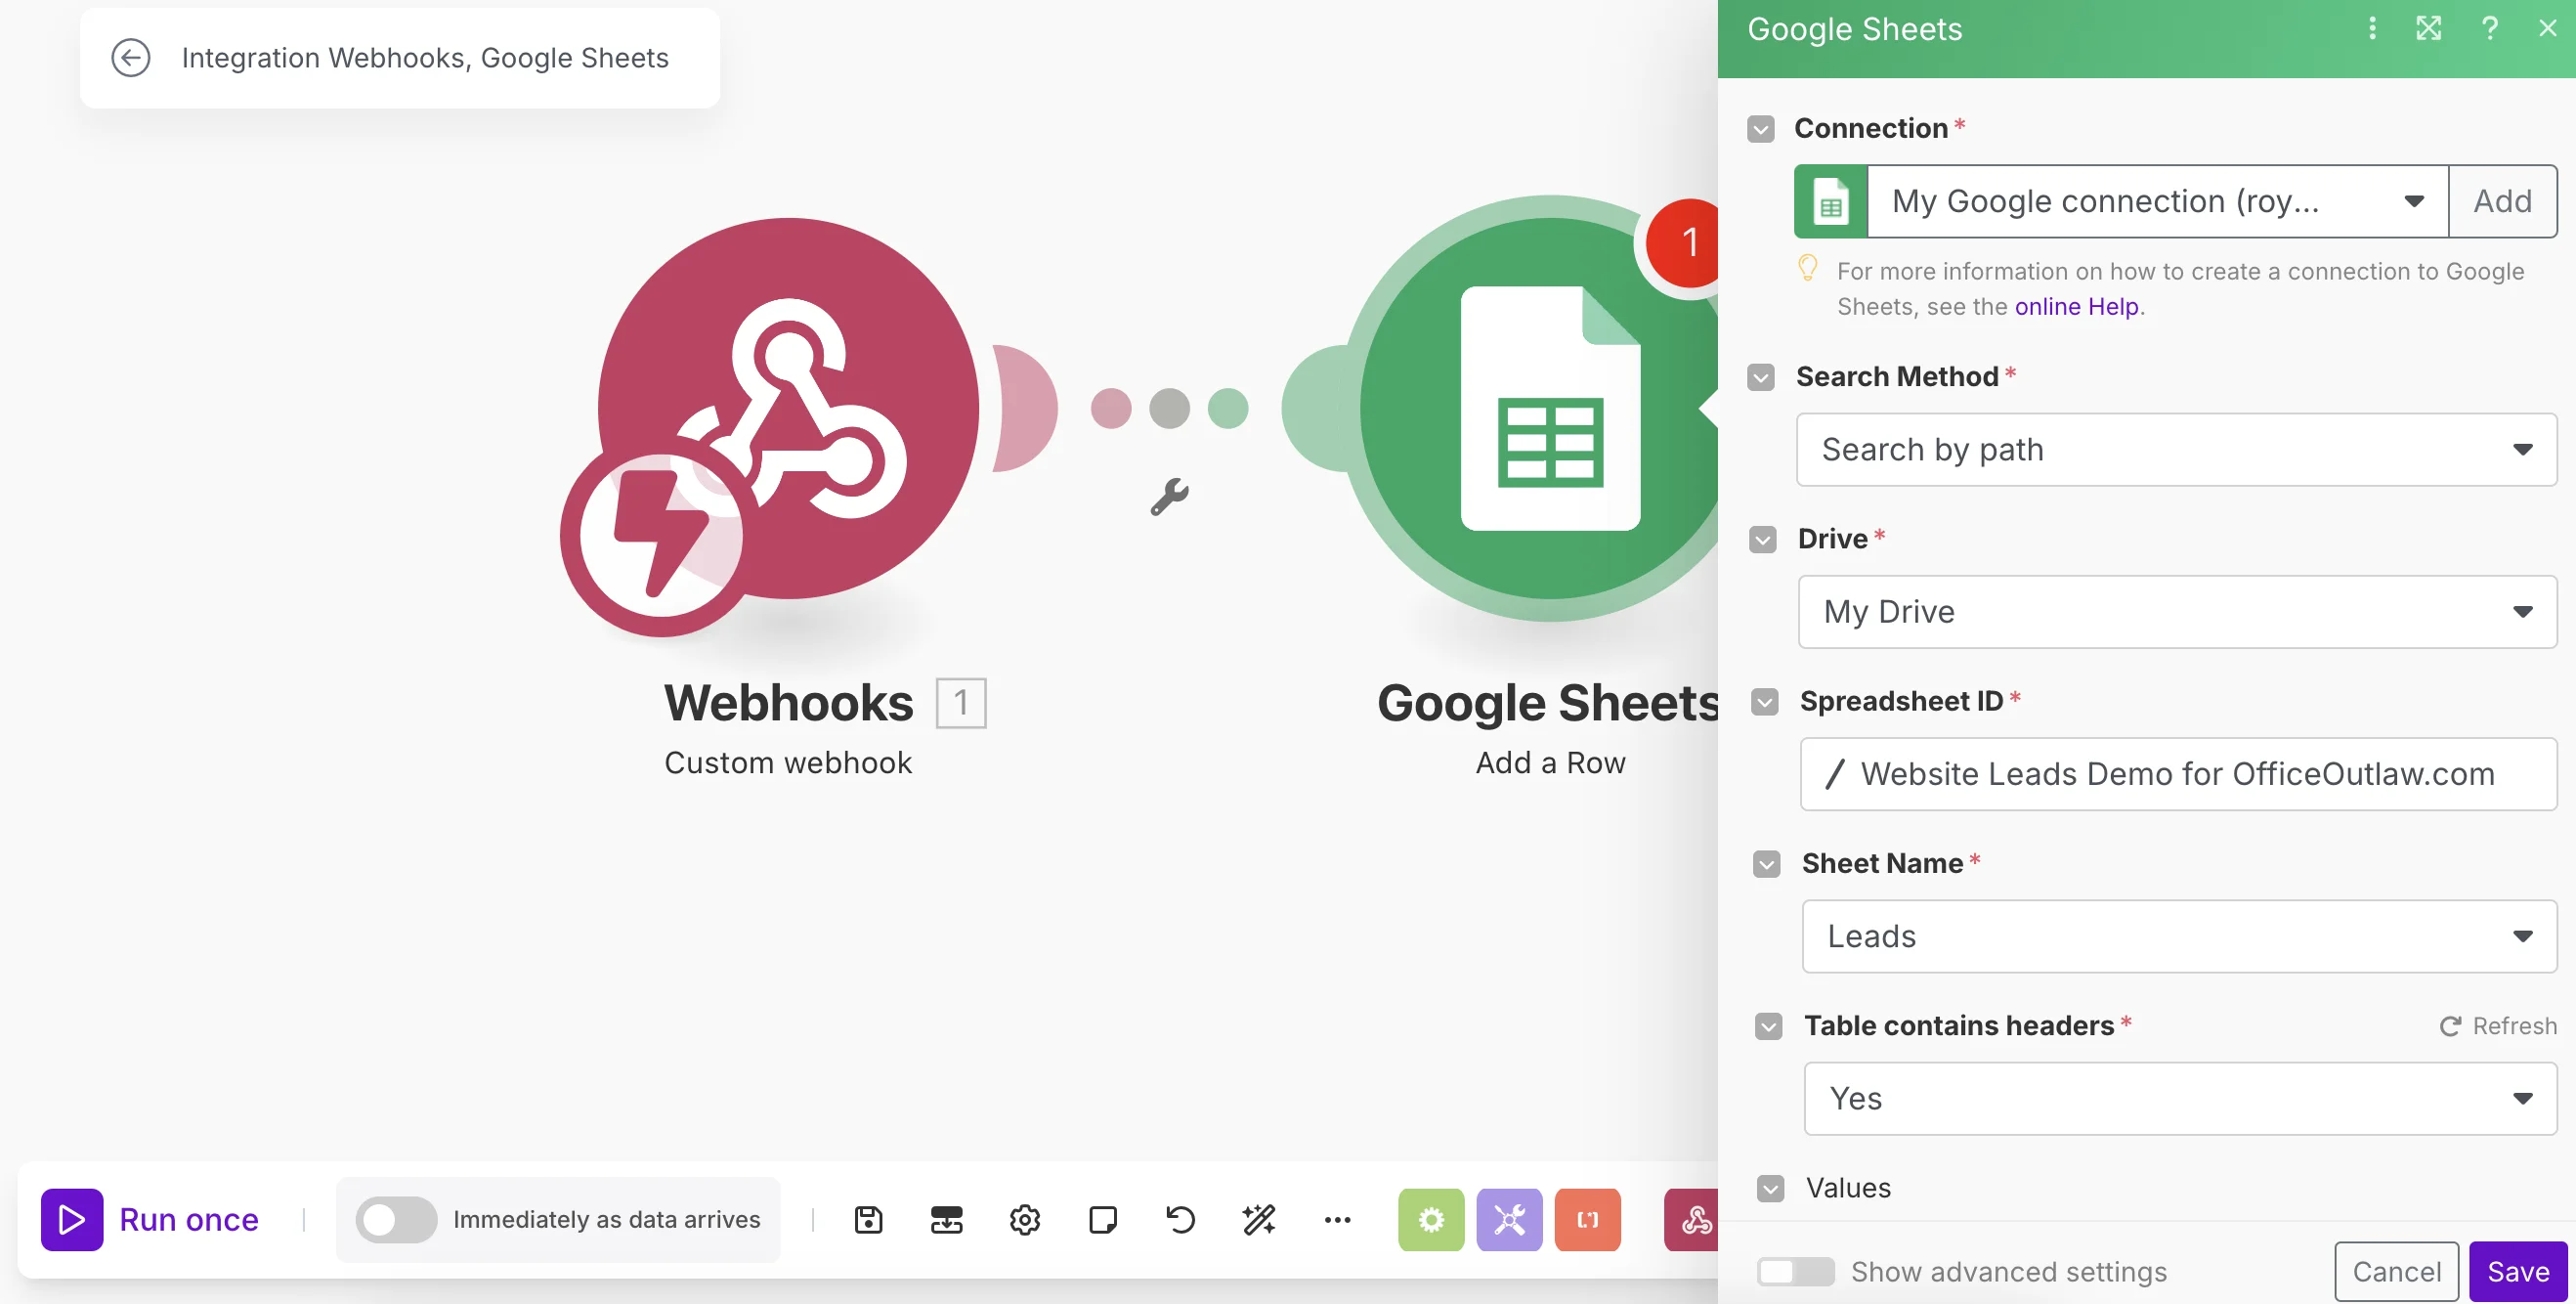
Now, we'll create the Google Sheets file with the columns we want to add. For the "Lead Quality" and "Deal?" columns, I used data validation that limits the values the cell receives to make it more consistent and automatable later.
Now that the sheet is ready, we'll connect it to Make so the data received from the form can be updated.
Make sure you have edit permission to the Google Sheets file, as Make will technically use your Google account to update it.
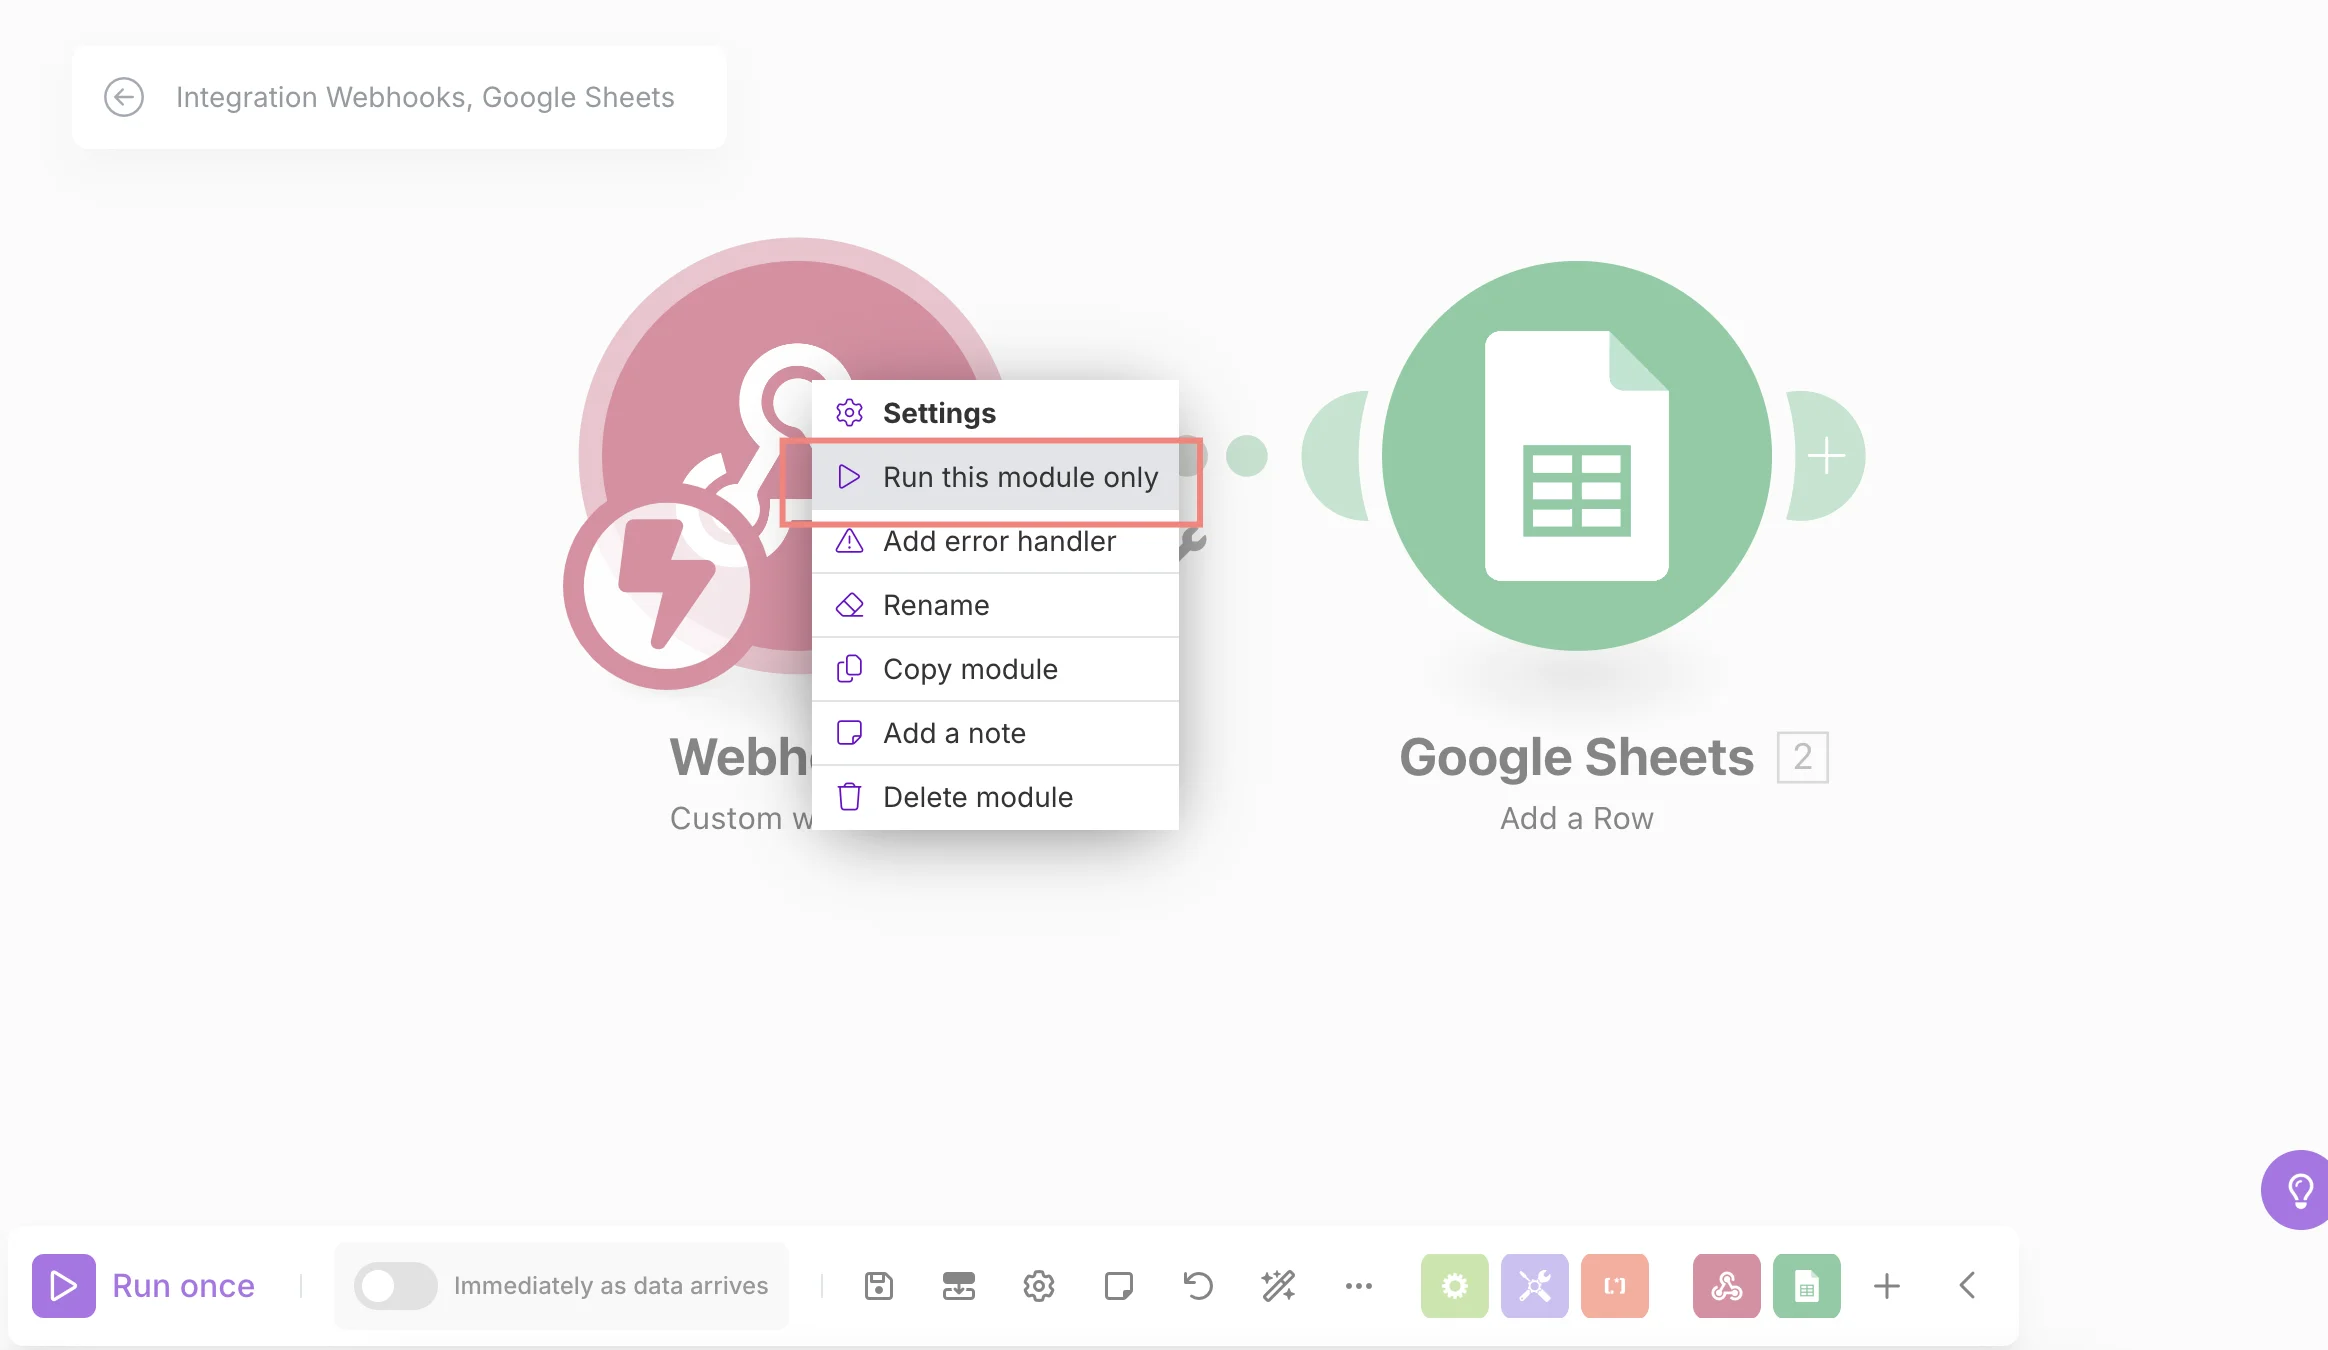
Now, before assigning form fields to Google Sheets columns, we'll run the Webhook module only to receive the data structure from the form submission.
To do that, click on the webhook module, then on "Run this module only", and proceed to submit the form on your site.
Make sure it's the same form you added the webhook URL to a couple of steps ago.
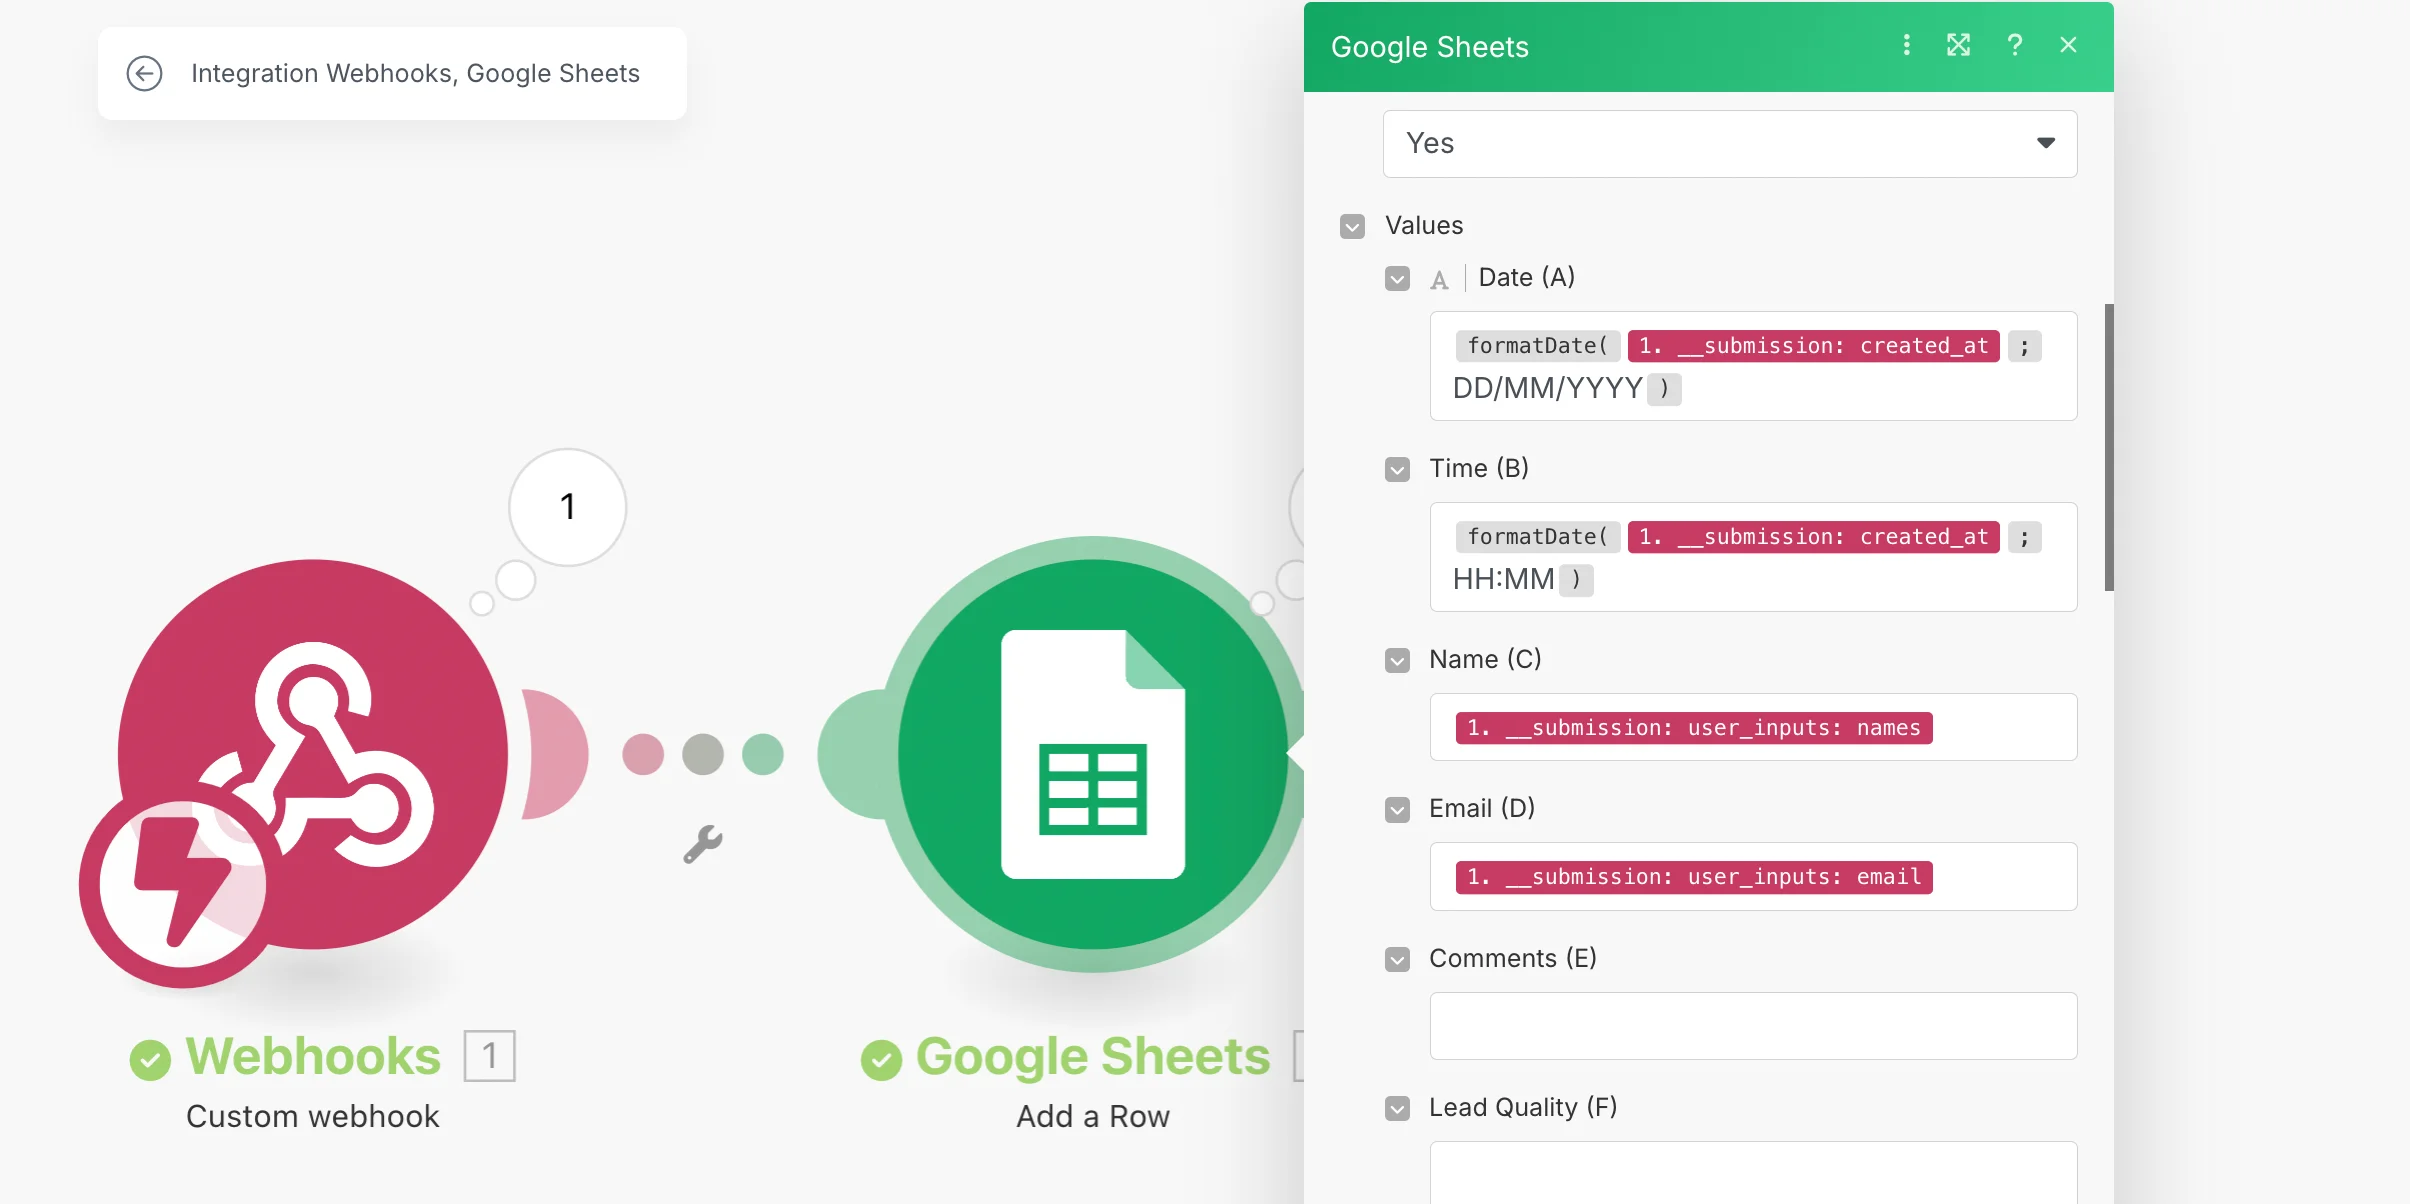
So now, after we submitted the lead, we received the data to Make, and we can use its structure to re-assign and edit fields and metadata from the form and pass them on to Google Sheets.
If you look at "created_at" and "updated_at," they send the timestamp in a YYYY-MM-DD hh:mm format, which I honestly don't mind. However, I want to show you an example of using some built-in functions within Make to edit values before passing them forward.
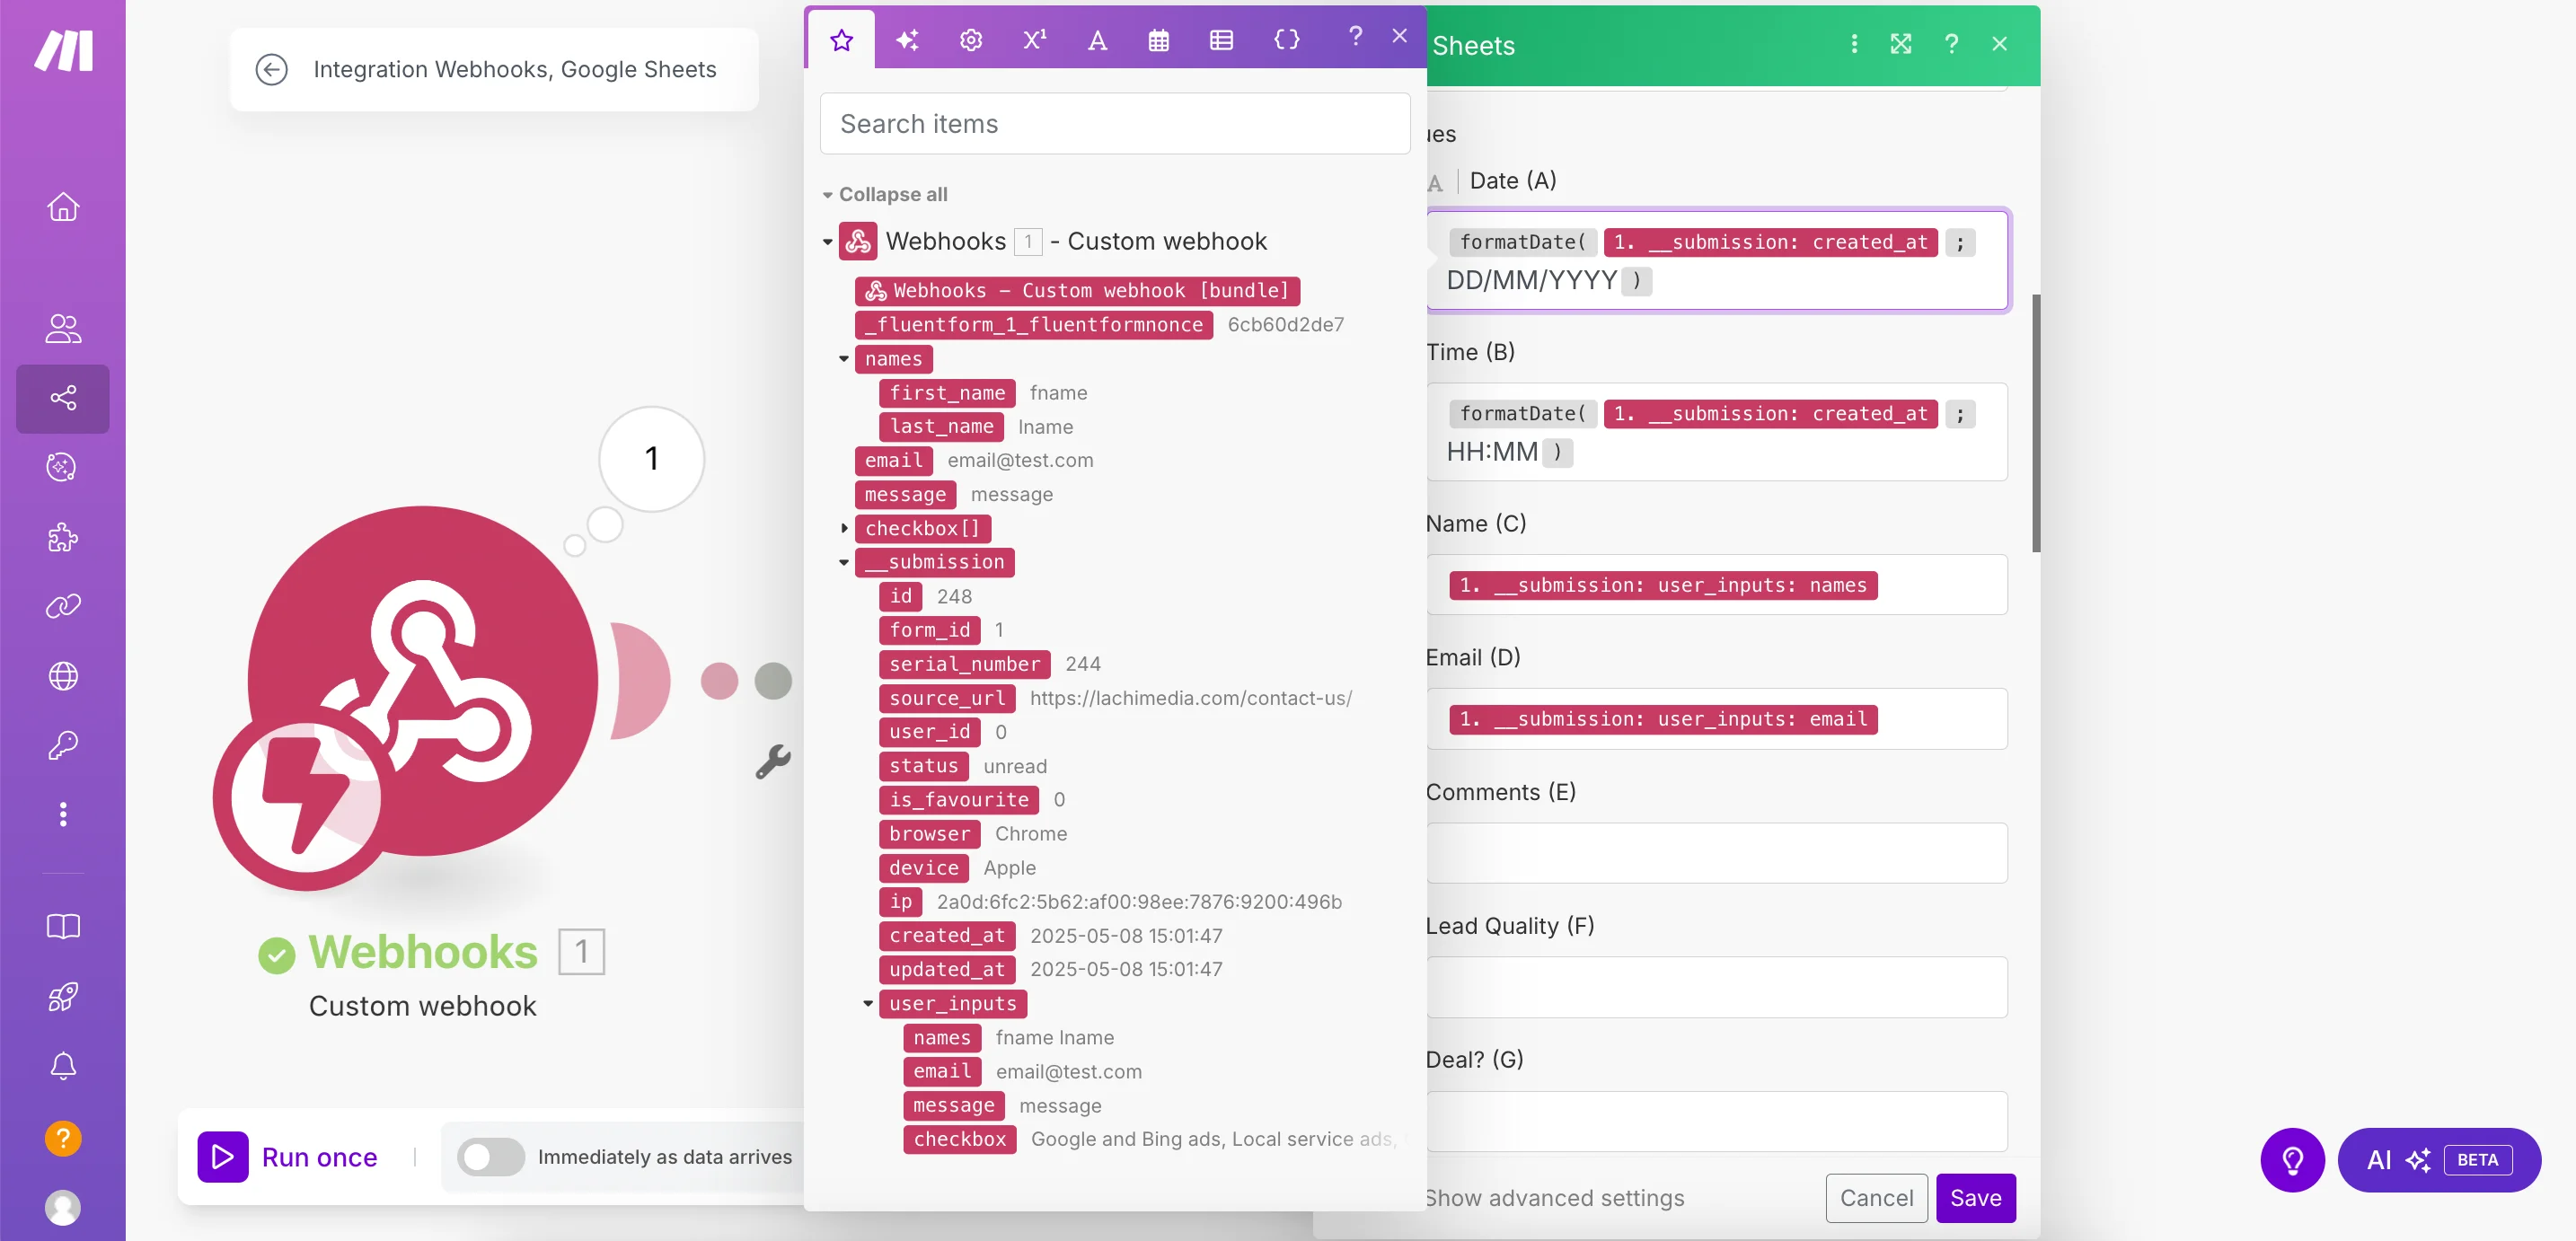
Next to the 'star' icon above the search bar, there are a few categories of functions you can use to manipulate data the way you want. In our case, I used the formatDate function. I showed it where to take the raw value from, and how to reformat it:
This is for the date:
And this for the time:
The functions usually have examples so you rarely need to type all this gibberish out, so don't worry about it too much.
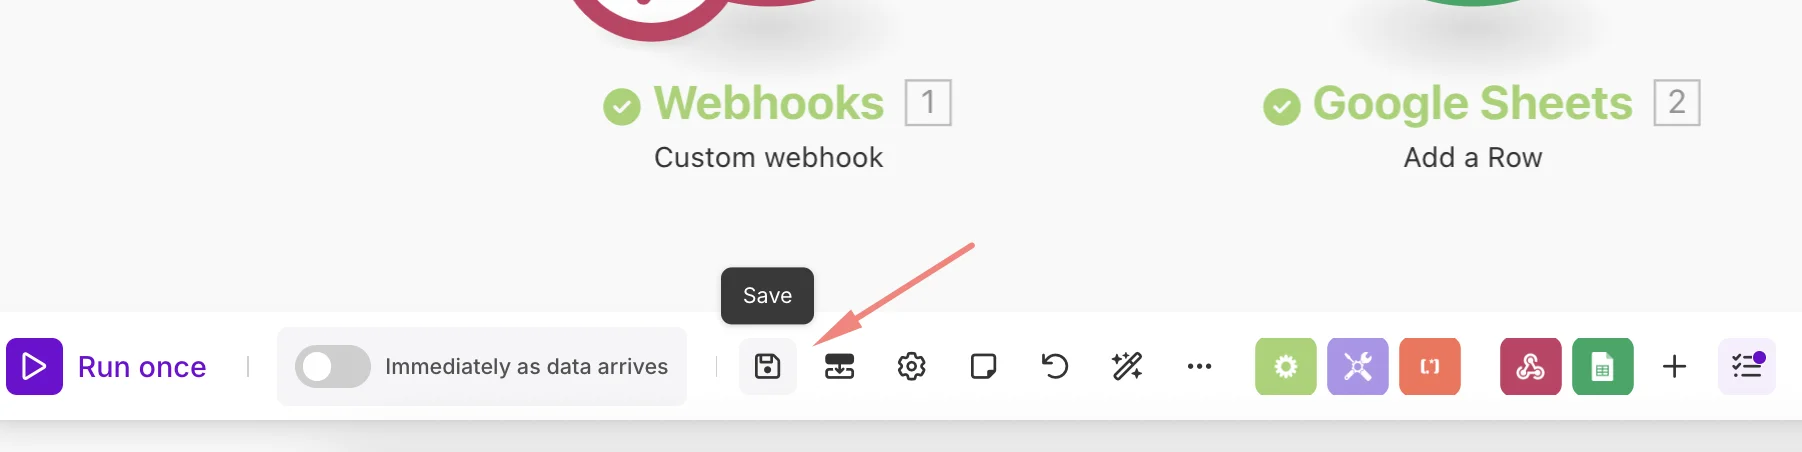
Once we've mapped everything, we'll click the purple "Save" button at the bottom of the Google Sheets menu.
Now save the entire scenario by clicking the icon that should have changed in 2001 but hasn't yet.
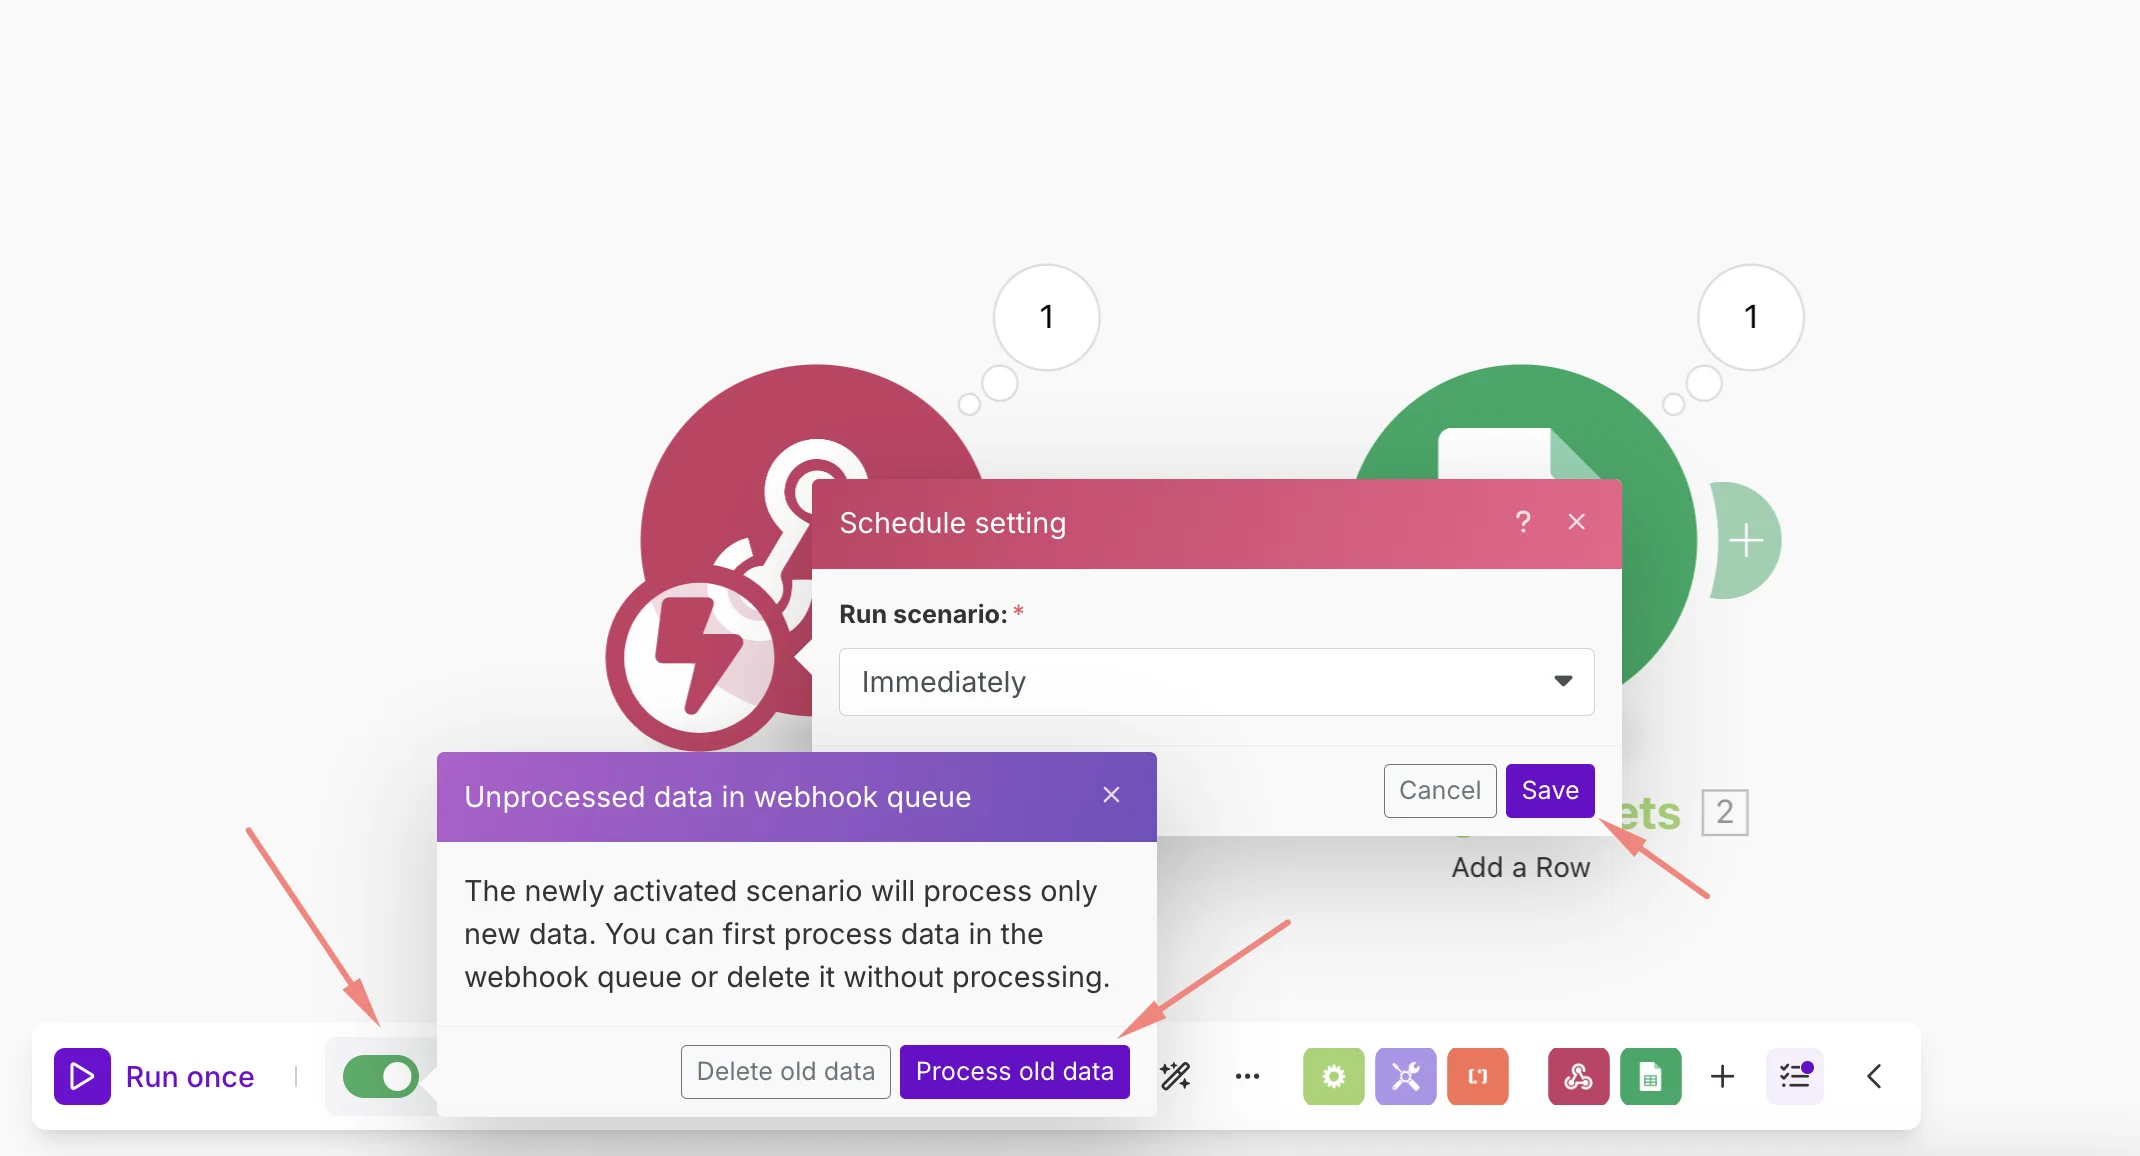
Toggle the scenario to run as soon as data arrives, and ask it to process old data if you're given the option. This will most likely only happen if you test it twice.
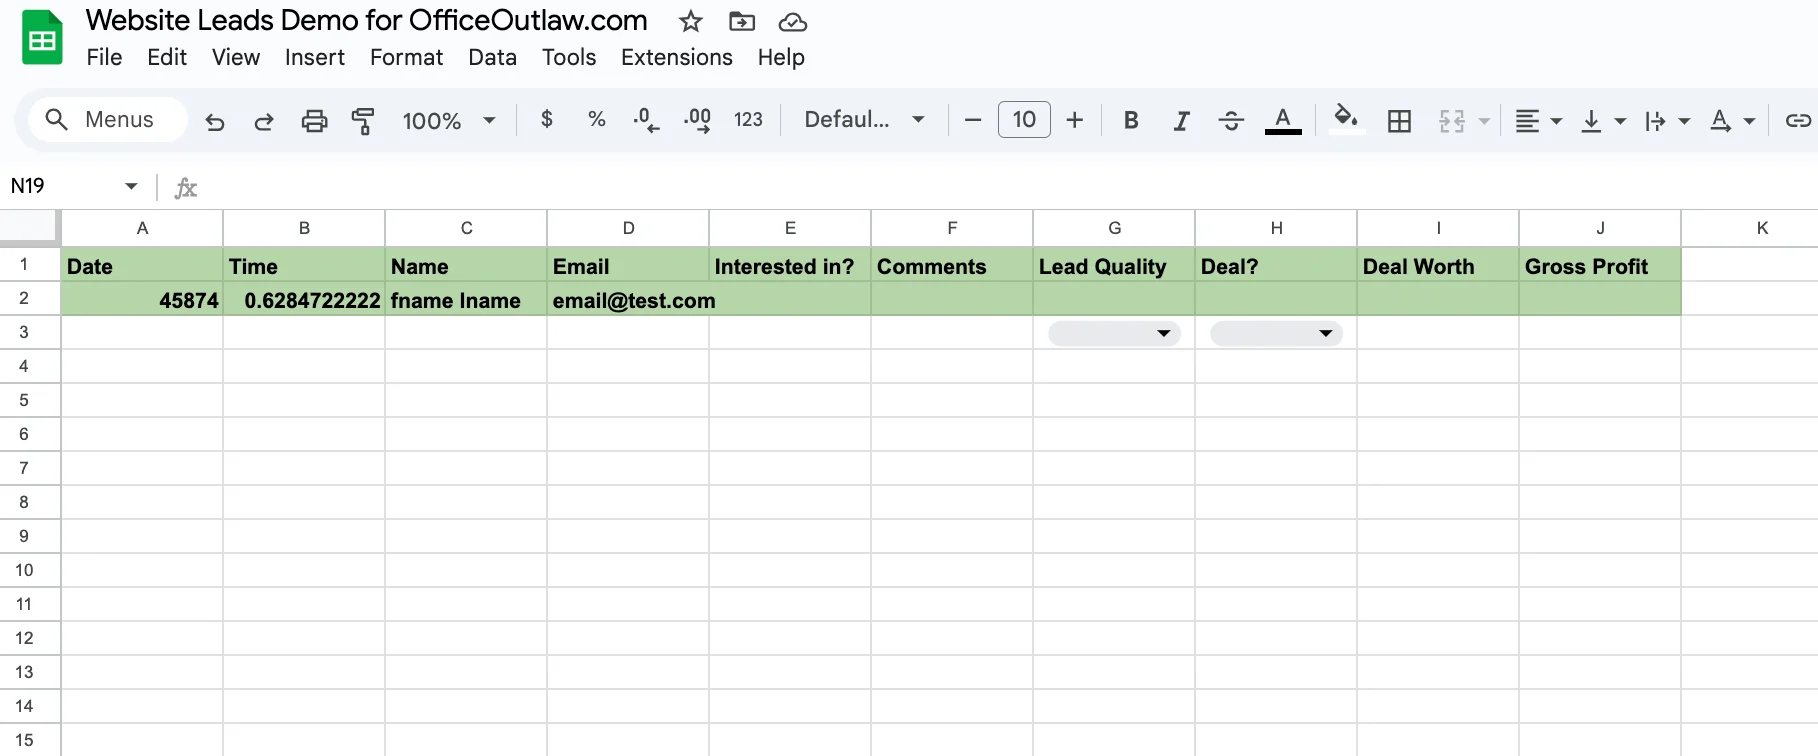
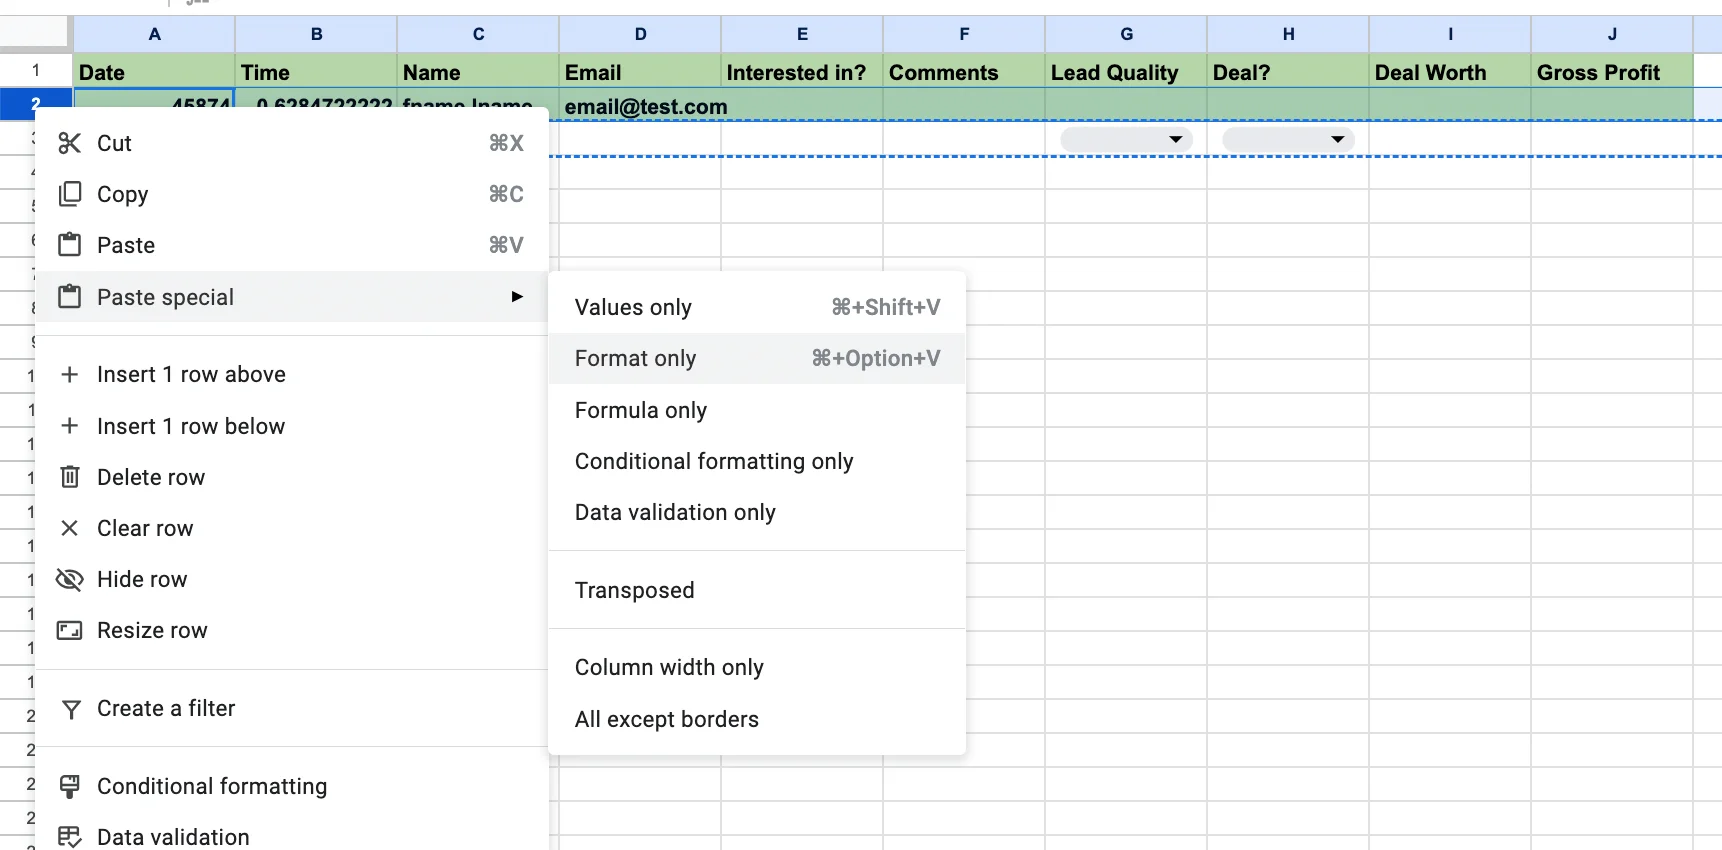
The Google Sheet received the data, but took the formatting from the headline.
So we'll copy the 3rd row and paste its format on the 2nd row:
Make another test submission to test the entire process (because why not?):
And I'll direct you to the Google Sheet itself so you can see if it worked and copy the file to your own drive so you can build upon it rather than starting from scratch:

 docs.google.com
If you want to add another form from your website or leads from other sources, you'll need to create another webhook and another scenario, and connect them to the same Google Sheet.
Good luck!
In this guide, I'll show you how you can connect your website forms to Google Sheets (don't worry, Rem, you can also use Excel 365) through Make (using a webhook).
At this point, Make might still offer a free 3 months of their Team package (through here). The last comment from Apr 30 stated that it's still working.
That being said, this guide will work on Make's free tier as well.
I tried to write this guide in a way that it will be understood by people who have never used Make before. If there's anything I haven't covered or you still have questions, just post them below.
There are many different ways to manage the sheet itself, and in my case, I use it mainly to help clients keep track of their leads if they don't have a CRM system in place. Here's an example of how it can look and work when several sources are connected to the same sheet. The data is fake, and it's regenerated on every update, so don't get too excited.
Let's get to it.
We'll start by creating a new scenario. A scenario is basically (and in a very simplistic way):
A process that takes one thing (in our case, a form submission from your site), edits it (so that the data is presentable and can be accepted by another service, like Google Sheets), and then sends it elsewhere (a Google Sheets document).
In the new scenario, we'll click on the big + sign in the middle and create a new custom webhook.
A webhook is very similar to the way S2S tracking works. It's a URL that contains parameters that include data we want to use (in our case, form fields and a few meta fields such as time of submission)
A pro tip: Name your webhooks appropriately so you can find them later and they stay organized.
Now, copy your webhook URL, so you can paste it on your site form.
This is how the Fluent Forms integration looks, but each form solution does it differently. CF7 requires an additional free add-on, and Elementor has it built-in in the forms under "Actions after submit." Most of them are relatively similar.
Now, we'll create the Google Sheets file with the columns we want to add. For the "Lead Quality" and "Deal?" columns, I used data validation that limits the values the cell receives to make it more consistent and automatable later.
Now that the sheet is ready, we'll connect it to Make so the data received from the form can be updated.

Make sure you have edit permission to the Google Sheets file, as Make will technically use your Google account to update it.
Now, before assigning form fields to Google Sheets columns, we'll run the Webhook module only to receive the data structure from the form submission.
To do that, click on the webhook module, then on "Run this module only", and proceed to submit the form on your site.
Make sure it's the same form you added the webhook URL to a couple of steps ago.
So now, after we submitted the lead, we received the data to Make, and we can use its structure to re-assign and edit fields and metadata from the form and pass them on to Google Sheets.
If you look at "created_at" and "updated_at," they send the timestamp in a YYYY-MM-DD hh:mm format, which I honestly don't mind. However, I want to show you an example of using some built-in functions within Make to edit values before passing them forward.
Next to the 'star' icon above the search bar, there are a few categories of functions you can use to manipulate data the way you want. In our case, I used the formatDate function. I showed it where to take the raw value from, and how to reformat it:
This is for the date:
Code:
{{formatDate(1.`__submission`.created_at; "DD/MM/YYYY")}}
Code:
{{formatDate(1.`__submission`.created_at; "DD/MM/YYYY")}}Once we've mapped everything, we'll click the purple "Save" button at the bottom of the Google Sheets menu.
Now save the entire scenario by clicking the icon that should have changed in 2001 but hasn't yet.
Toggle the scenario to run as soon as data arrives, and ask it to process old data if you're given the option. This will most likely only happen if you test it twice.
The Google Sheet received the data, but took the formatting from the headline.
So we'll copy the 3rd row and paste its format on the 2nd row:
Make another test submission to test the entire process (because why not?):
And I'll direct you to the Google Sheet itself so you can see if it worked and copy the file to your own drive so you can build upon it rather than starting from scratch:
Website Leads Demo for OfficeOutlaw.com
If you want to add another form from your website or leads from other sources, you'll need to create another webhook and another scenario, and connect them to the same Google Sheet.
Good luck!